Shooting Tips for Double Exposure Portraits
Normal double exposure is not a new thing to most of us. To give it a twist, we will share how to create interesting double exposure portraits in this article.
How to do that?
Double exposure means superimposing two images into one single image.
We can apply this technique to portrait photography and create interesting result. Follow the steps below:
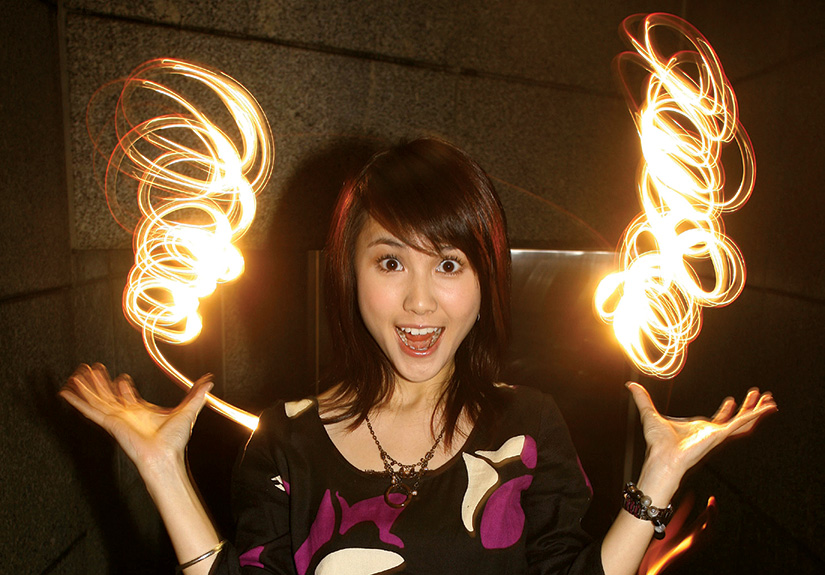
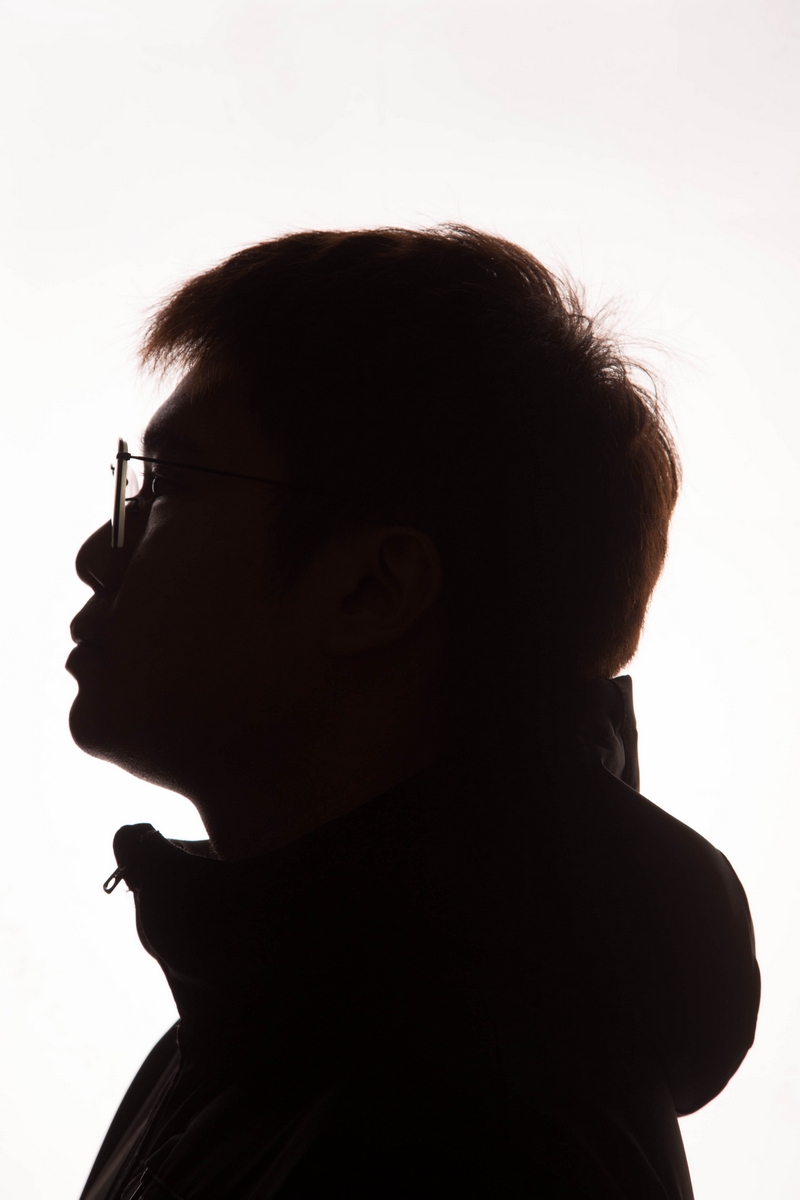
1. First, take a portrait that meets the below two requirements:
1. First, take a portrait that meets the below two requirements:
- • An under-exposed subject
- • A white background due to over-exposure (one easy way to create a back-lit photo is to position the subject in front of a light source)
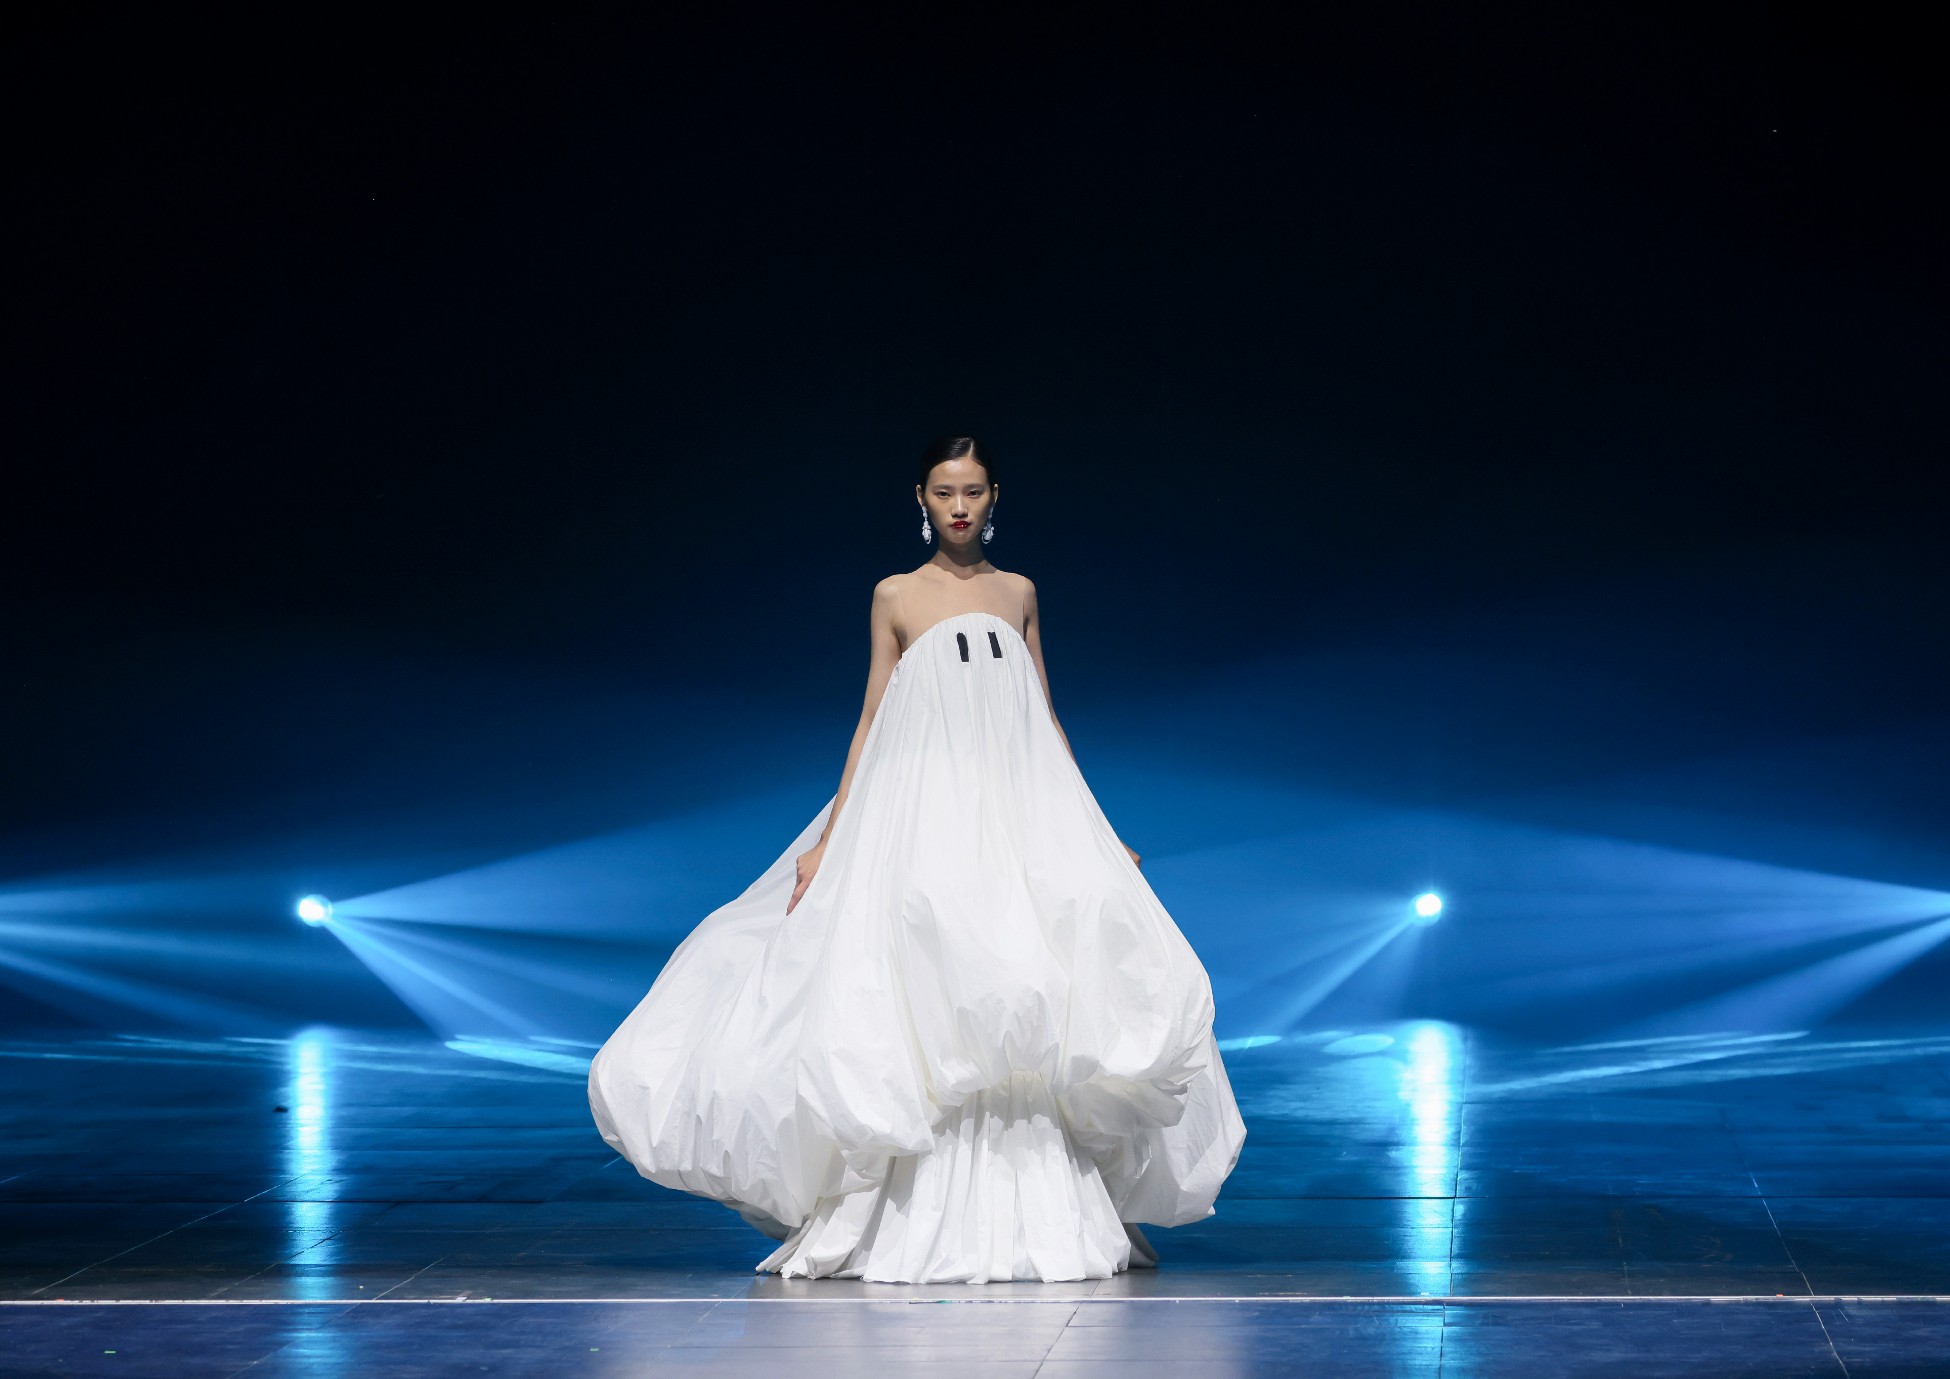
2. Then take another photo with different themes, such as a landscape photo. For better double exposure result, this photo should meet the below two requirements:
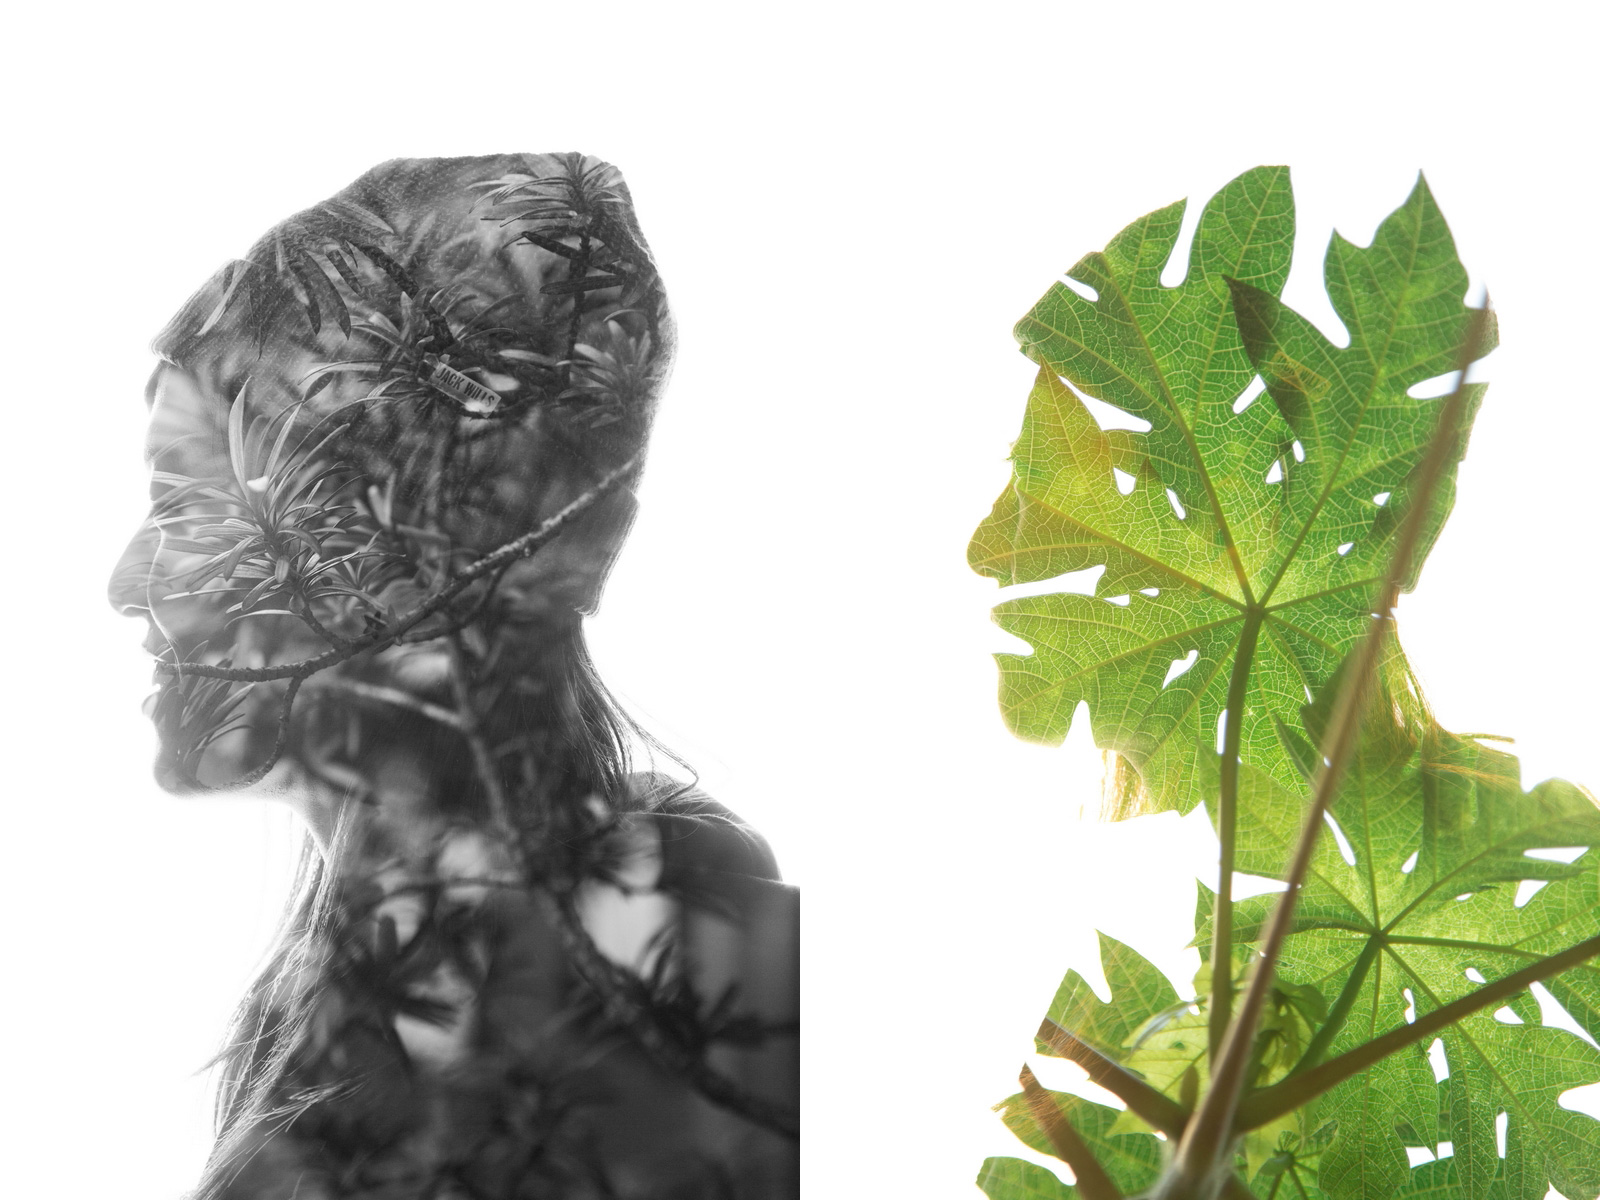
After the shooting is done, the resulting photo will show a portrait-shaped area filled with landscape and the originally over-exposed area will get intensified (close to solid white). To create double exposure portraits, we can either do it in post-editing or shoot with some Canon cameras that feature built-in multiple exposure function (including EOS-1D X, EOS 5D Mark III, EOS 7D Mark II, EOS 6D and EOS 70D) for double exposing a single image.
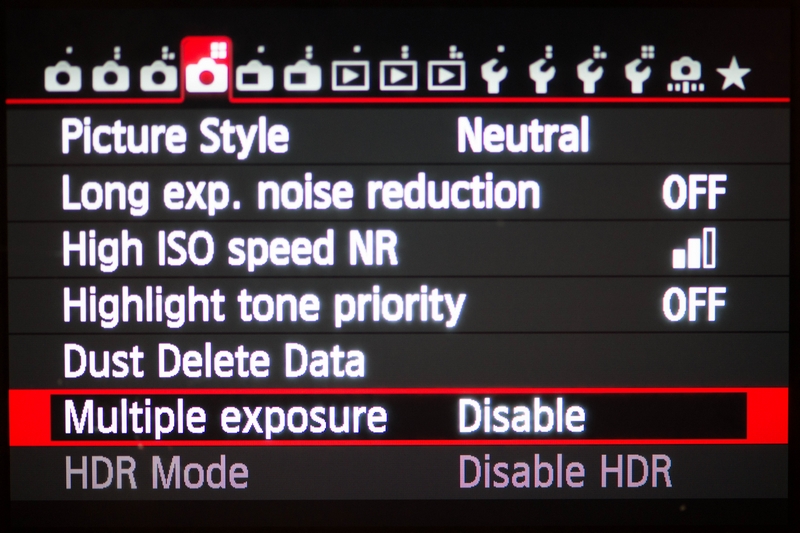
Take EOS 6D as an example. You can enable the “Multiple exposure” function by going to the fourth page of the menu. Once enabled, the camera will superimpose the two consecutive photos you take afterwards. Apart from Enable/Disable, there are a few settings to select under “Multiple exposure” function, which include “Multi-expos ctrl”, “No. of exposures” and “Continue Mult-exp”.
- • Optimally exposed without highlights going solid white and shadows becoming black
- • The subject size is larger than the portrait’s subject and both occupy a similar position
After the shooting is done, the resulting photo will show a portrait-shaped area filled with landscape and the originally over-exposed area will get intensified (close to solid white). To create double exposure portraits, we can either do it in post-editing or shoot with some Canon cameras that feature built-in multiple exposure function (including EOS-1D X, EOS 5D Mark III, EOS 7D Mark II, EOS 6D and EOS 70D) for double exposing a single image.
Take EOS 6D as an example. You can enable the “Multiple exposure” function by going to the fourth page of the menu. Once enabled, the camera will superimpose the two consecutive photos you take afterwards. Apart from Enable/Disable, there are a few settings to select under “Multiple exposure” function, which include “Multi-expos ctrl”, “No. of exposures” and “Continue Mult-exp”.
“Multi-expos ctrl” offers two settings to choose from - Additive and Average. Additive is similar to double exposure on a film, where the exposure level of the double exposed area is the sum of both images. Therefore, the double exposure image will likely be over-exposed if we do not deliberately decrease the exposure level. Average will take an average value of the exposure levels of both images automatically, lowering the chance of over-exposure. “No. of exposures” refers to the number of superimposing images. In our opinion, two images are enough or else the photo’s content will look chaotic and there will be a high chance of over-exposure.
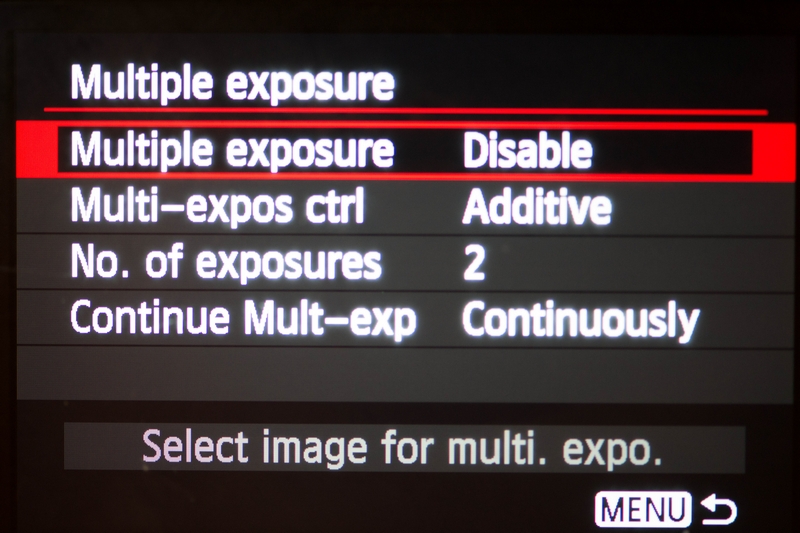
The “Multiple exposure” function of Canon cameras is pre-set for one-time use, i.e. only the two photos taken immediately after enabling the “Multiple exposure” function will be superimposed, and the camera will go back to normal shooting afterwards. We can set the “Continue Mult-exp” to Continuously if we want to continue with the double exposure shooting.
What is the principle behind double exposure portraits?
The image sensor absorbs light to create an image. In case an overly amount of light is absorbed (over-exposure), the image will turn into solid white. In other words, a double exposure image is to let the additive exposure level of the background (i.e. the area to appear in solid white) high enough to turn into pure white, while the subject (i.e. portrait) area achieves a normal exposure level after the addition.
Things to note for a better result
The room for creativity in double exposure shooting is huge. The below tips are only for reference if you want to achieve a more apparent double exposure result with more defining contours:
• Take black and white photos for more apparent contrast
• Adjust the portrait’s subject and the overlapping subject to the same position
• Increase the proportion of portrait in the composition
• Take black and white photos for more apparent contrast
• Adjust the portrait’s subject and the overlapping subject to the same position
• Increase the proportion of portrait in the composition