Freezing Time with High-Speed Photography

High-speed photography can freeze an image that is invisible to the eyes. It can be done easily at home too. In this article, we will demonstrate how to capture splashes – a perfect subject for high-speed photography as splashes can come in different fascinating forms.
How It Works
The high-speed photography we talk about in this article is not about using a high-speed shutter, but refers to flash shooting using a very short Flash Duration. As flash fires in milliseconds or even 0.1 milliseconds, the fluid movement is negligible in this split moment. And by using a proper camera setting to prevent any ambient light from entering the lens, the splashes will be frozen in time and look incredibly sharp in the image.
Preparation
1. A glass filled with water
2. Flash x 2
3. Camera and Tripod
4. Lemon (or other thing similar, will be explained later) x 1 slice
5. White wall
Apart from the above major gear, you can also prepare tools like bowl or towel for cleaning up after shooting.
2. Flash x 2
3. Camera and Tripod
4. Lemon (or other thing similar, will be explained later) x 1 slice
5. White wall
Apart from the above major gear, you can also prepare tools like bowl or towel for cleaning up after shooting.
The Setup
The Setup of Gear
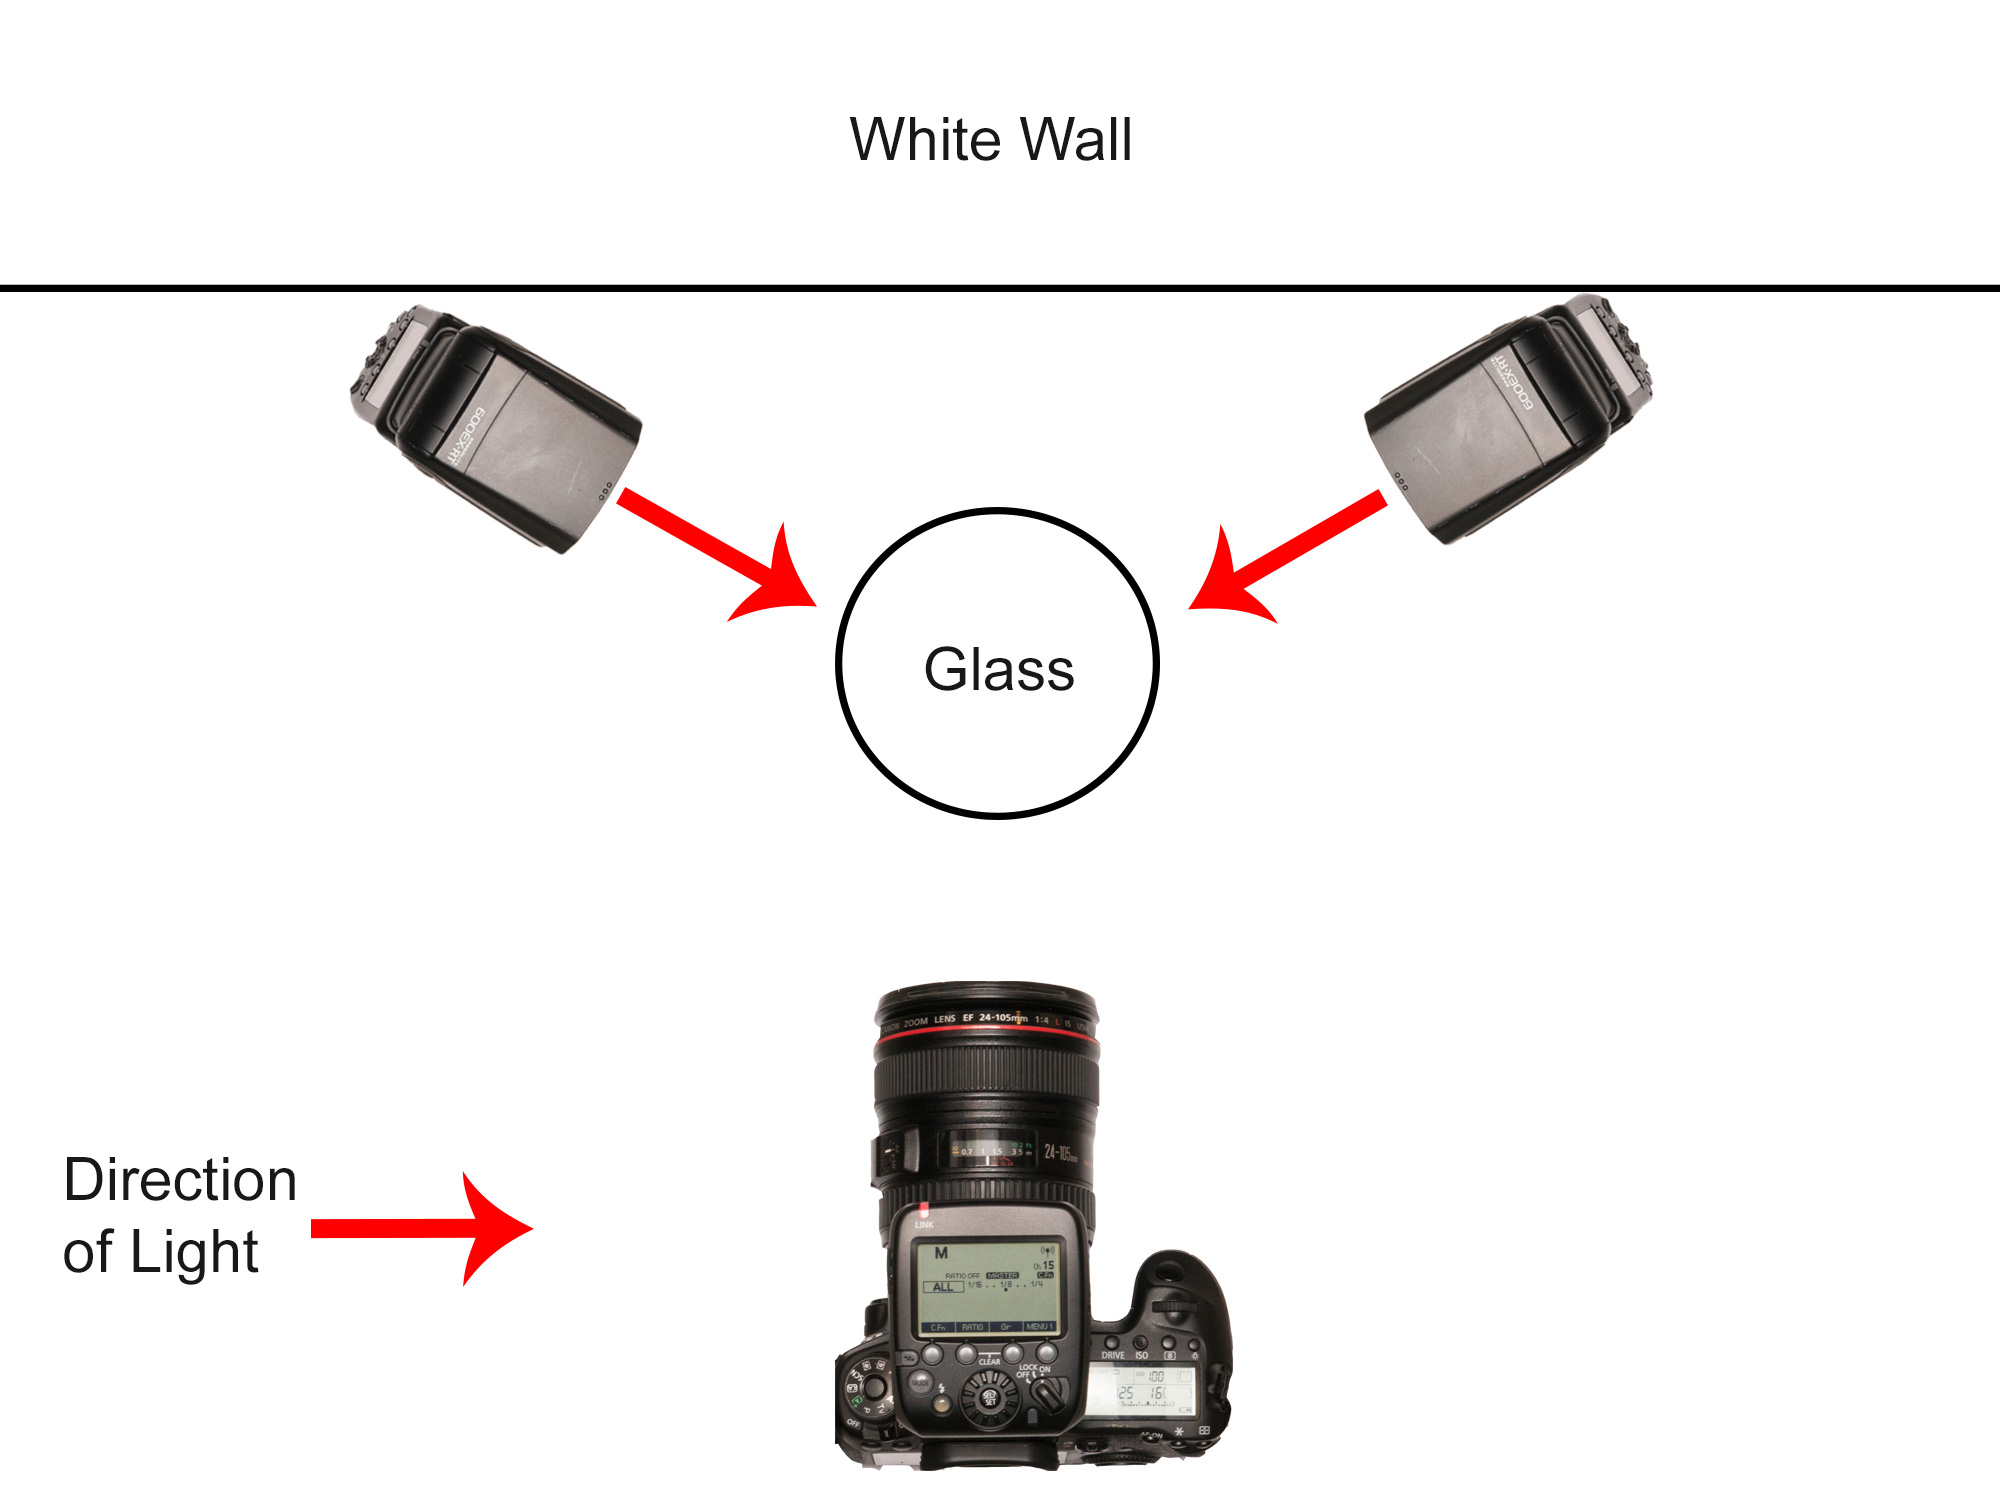
Set up the gear as in the scene shown below:
Mount your camera on a tripod. Put the glass between the camera and the white wall, but be sure not too close to the wall or else a shadow will be cast on the wall. Shoot horizontally to the water surface to capture the splashes. One of the flashes is placed facing the wall to create a light spot in the background (the farther the flash is away from the wall, the smaller the light spot is in the background) and at the same time provide a little backlighting for the subject. Another flash is placed facing the subject for illumination.
Camera Setting
Use a f/16 aperture to ensure adequate depth of field to capture the splashes, an ISO 100 setting and a shutter speed of 1/125s to ensure that no ambient light will enter the lens. The output power of the flash facing the wall should be higher than that of the flash aiming at the subject – an approximately 1/8 for the former and 1/32 for the latter.
The Shooting
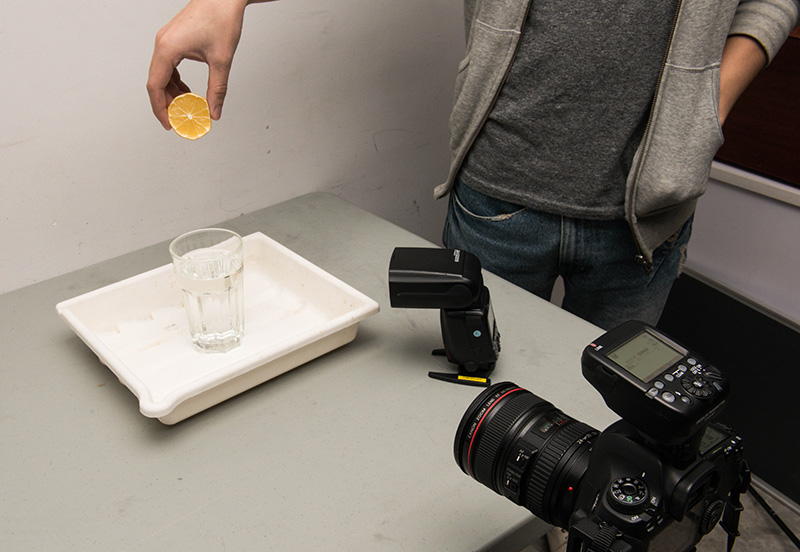
The key for a successful high-speed shot is to shoot at a right timing. We need to have something to be thrown into the water, such as a slice of lemon or other thing similar in size. When shooting, get someone to help drop the object into the water, and freeze the moment with flashlight when the water splashes. Be reminded that water splashes only after the object drops into water, so the right timing to press the shutter button is after the dropping but not the exact moment when the object touches the water surface. Give it a few trials and you will know when is the right timing to shoot.
If no one is available to help, we can use a shutter cable release as a workaround. Simply drop the object with one hand and press the shutter cable release with the other hand to capture an image. We should also drop it from a higher position so that we can have more time before pressing the shutter.
If no one is available to help, we can use a shutter cable release as a workaround. Simply drop the object with one hand and press the shutter cable release with the other hand to capture an image. We should also drop it from a higher position so that we can have more time before pressing the shutter.
Variations
The method mentioned above uses an object to create the splashes. In fact, there are many other variations when it comes to high-speed photography of fluid movements. For example, we can substitute water with milk. As milk is opaque, we can capture splashes that look like a sculpture:

Be sure that you clean up the scene thoroughly after shooting. Use detergent to clean the places or things that got milk spilled on, or else they will get stinky. For more varieties, we can inject water into the glass using a syringe to capture shots with both splashes and bubbles.
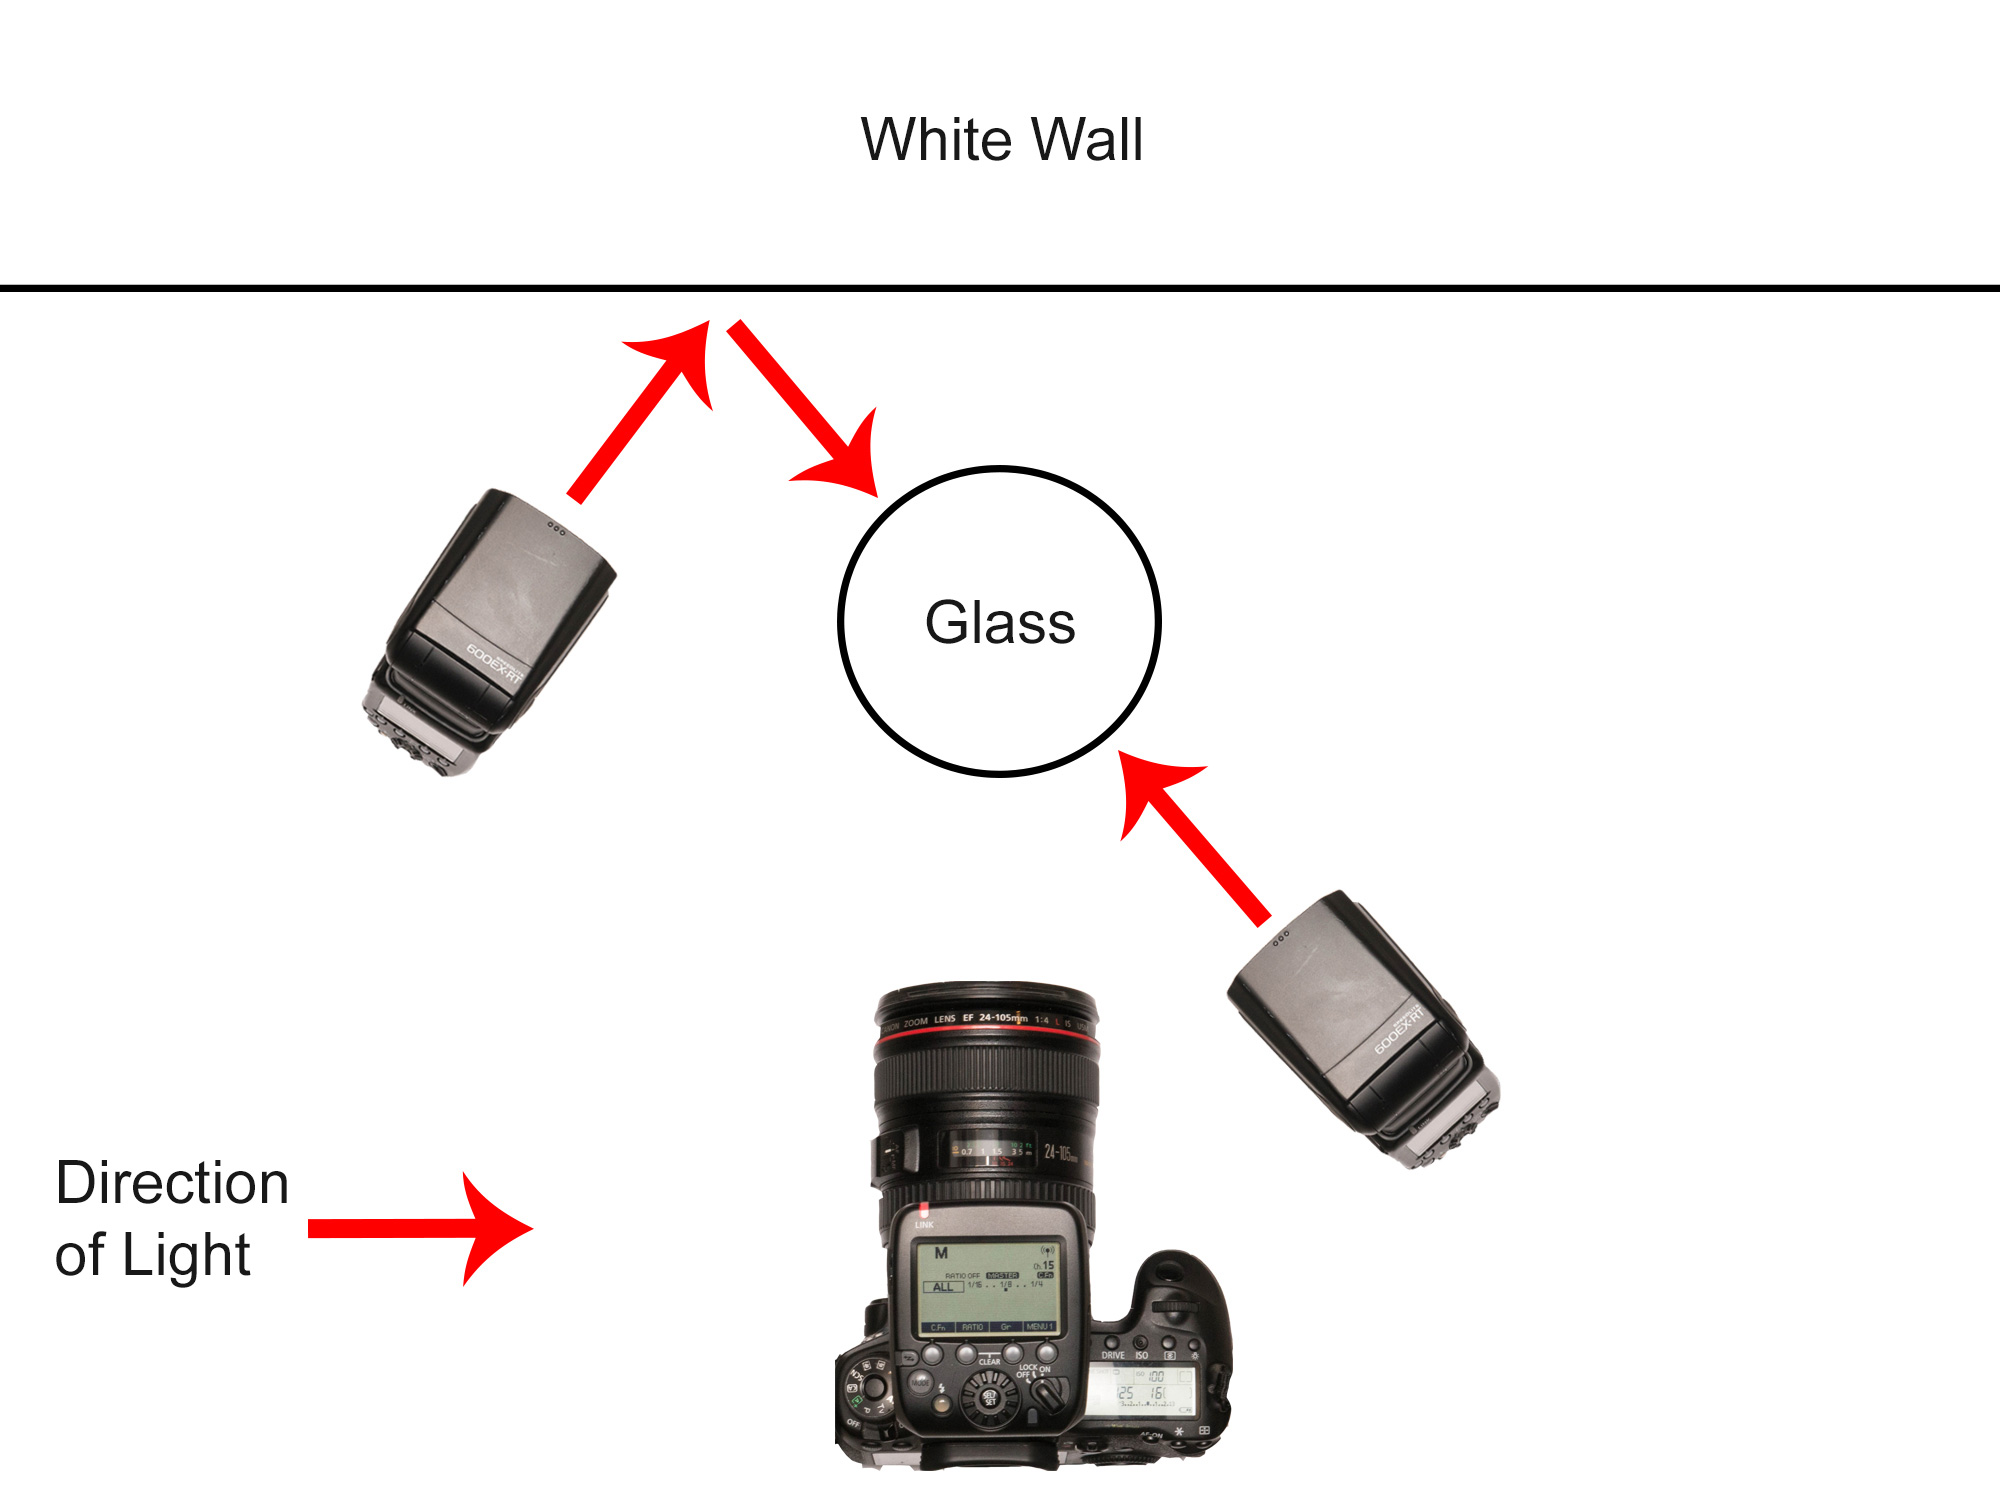
The same camera setting can be used. For lighting, we can shoot with a side back light. Place the flashes on both sides behind the glass and fire towards the glass to capture water droplets that look like shining pearls.