Journey to the Stars - Star Photography Tips
The southerly / southwesterly wind in summer gives Hong Kong a clear night sky which is good for star photography. Generally speaking, star photography refers to the capture of stars and star trails. This article is a basic introduction to star photography using DSLR cameras from three aspects - choice of equipment, things-to-note and shooting techniques. Even photography novices can enjoy their first journey to the stars and capture some nice star photos!
Equipment Requirement
Star photography involves long exposure time. That's why we need a rigid tripod to hold our cameras still. Long exposure also means high battery consumption. So make sure you bring a few more backup batteries with you.
Besides, we need a shutter release cable to prevent shake from pressing the shutter release button on the camera and to control the shooting intervals when photographing star trails. Also prepare a piece of black card for controlling the exposure area and time.
Star photography takes place mostly in the countryside at night. This may end up staying overnight in the wild due to the long shooting time needed and thus necessary camping gear should be prepared. Since this article is mainly about the photography techniques, camping related topics won't be covered here.
Shooting Techniques
Weather
Out of the four seasons, the summer and autumn night sky is the most clearest in Hong Kong. Yet to capture a clear shot of the starry night, we need a cloudless sky and without the presence of other light sources such as the city lights and even the moonlight. Therefore, shooting on a full moon night should be avoided. You can visit http://www.moonconnection.com/moon_phases_calendar.phtmlRecommended Star Photography Location for Beginners
Pak Tam Chung Bus Terminus in Sai Kung is recommended for star photography beginners as it's conveniently accessible by public transportation. KMB routes 94, 96R as well as minibus no. 7 and 9 will take you directly to the destination. There is also round-the-clock toilet facility nearby.Lens Choice
In general, a wide angle lens is often used for photographing the starry night and star trails as it can capture as many stars as possible in the frame. However, based on the compositional needs, you can also use lenses in other focal lengths or even a fish-eye lens. While the lens' focal length is subject to personal needs, the lens' aperture is preferred to be f/2.8 or larger in order to shorten the shooting time needed as well as giving users the flexibility to use a lower ISO to minimize the image noise.
Low-Light Focusing
There is no particular subject to focus in star photography. So the safest way is to focus manually to infinity and confirm the focus using the enlarged view in Live View mode.
Shooting Method - Stars
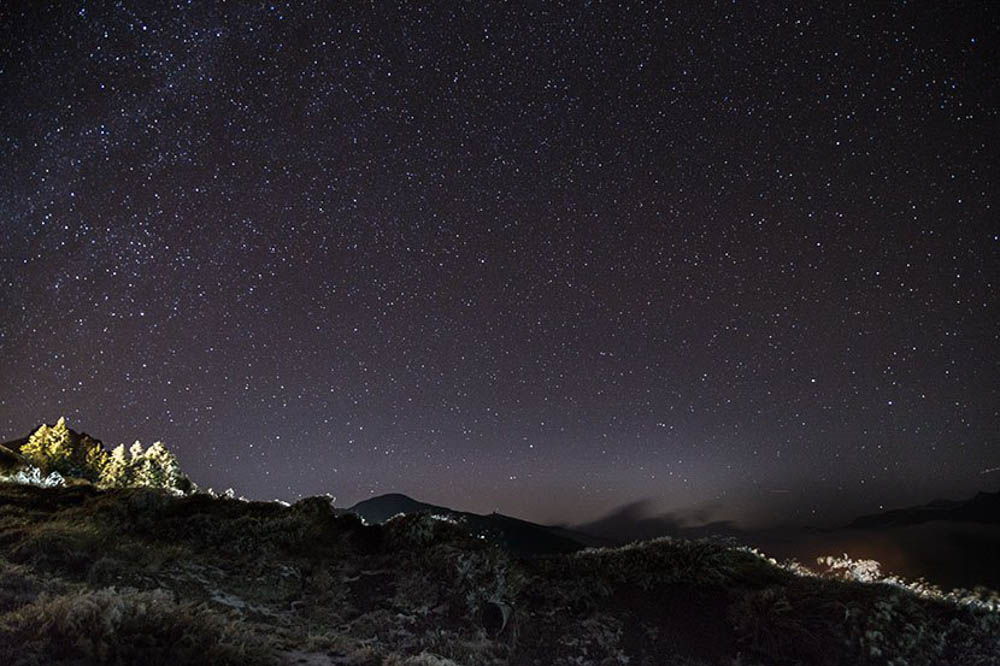
Photographing stars is relatively easier than photographing star trails. All it takes is long exposure time. Since long exposure shooting with digital cameras will result in increased image noise and the movement of stars will cause image blur, we should shoot with the lowest ISO possible to ensure image quality and use the quickest shutter speed possible to ensure image clarity. To achieve these, we need to adjust to the largest aperture to ensure accurate exposure. Based on experience, camera settings equal to f/1.4, ISO 400 and shutter speed of approximately 30s are adequate for bright capture of stars in a dark setting. Those who don't have a large aperture lens can use an ISO between 800 and 2000 for similar result.
In addition, long exposure shooting may cause over-exposure in the foreground especially when there are illuminating buildings. That's why we should always shoot in RAW format to ensure greater post-editing flexibility to adjust the exposure afterwards. Alternatively, we can take multiple shots with different exposure settings and merge them into one perfect image in post-editing, or use a black card to control the exposure area and time during the course of shooting.
In addition, long exposure shooting may cause over-exposure in the foreground especially when there are illuminating buildings. That's why we should always shoot in RAW format to ensure greater post-editing flexibility to adjust the exposure afterwards. Alternatively, we can take multiple shots with different exposure settings and merge them into one perfect image in post-editing, or use a black card to control the exposure area and time during the course of shooting.
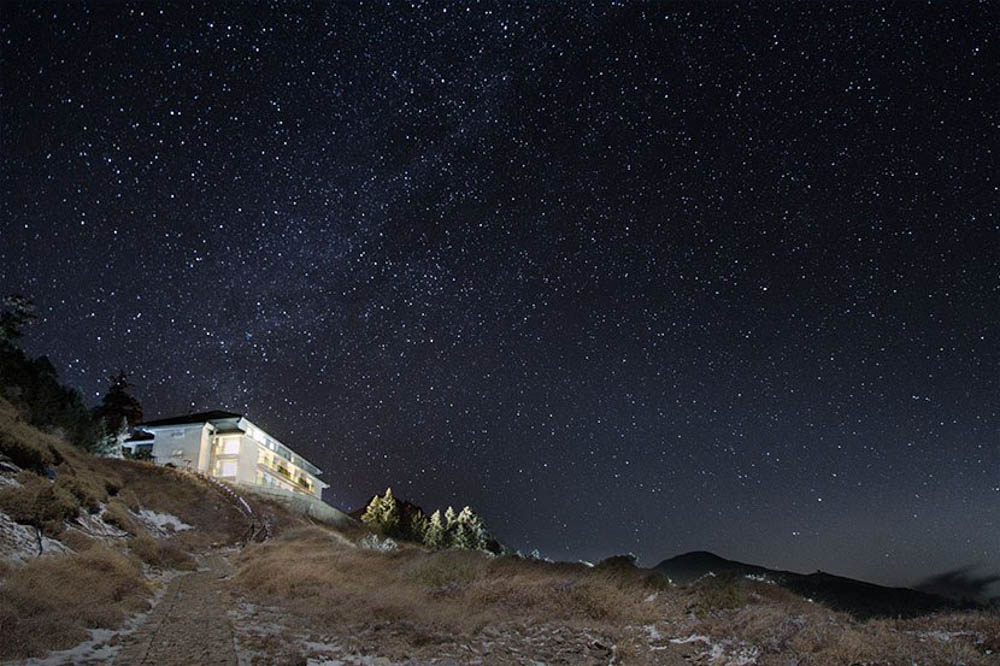
How to use a black card: For a shot taken at 30s exposure, use a black card to cover up the house for 29s, leaving only 1s exposure for the house. Wave the black card gently when it covers up the house to blur the edges so that the photo will have a more natural transition in the brightness
Shooting Method - Star Trails
Star trails refer to the trails of movement of stars. That being said, it's the Earth that turns but not the stars. With the Earth rotates about the north-south axis, the static stars thus appear to be moving when viewed from the Earth. Take some consecutive shots with long exposure and then superimpose them, you'll get a great shot of bright and defined star trails.
The camera settings used are similar with that when photographing stars, which are f/1.4, ISO 400 and 30s shutter speed. Take a series of consecutive shots and then superimpose them in post-editing software to connect the star trails seamlessly. A timer remote controller (such as TC-80N3) is recommended for use here to trigger the camera to shoot while avoiding camera shake. Besides, EOS 7D Mark II features an in-camera “Interval Timer” function for easy setting the number of shots and the shooting interval, thus eliminating the need of a timer remote controller.
The time the stars take to complete a rotation about the north-south axis is equivalent to that of the Earth's rotation, i.e. 24 hours. Therefore, photographing the stars for a consecutive period of 30 minutes means a circular path of 1/48 of the circle traveled by the stars, i.e. 7.5 degrees of rotation about the north-south axis (note that the farther the stars are away from the axis the longer distance they move, given the same degree of rotation). The star trails captured this way would be clear and defined.
The “Startrails” software can be used for superimposing the images:
Save all images to be imported in one single folder. Open the software, click the “Import” button (as shown) to import the images. Then click the “Superimpose” button (as shown) to superimpose the images to become one final photo of star trails
Link to download the “Startrails” software: http://www.startrails.de/Startrails.zip
Composition
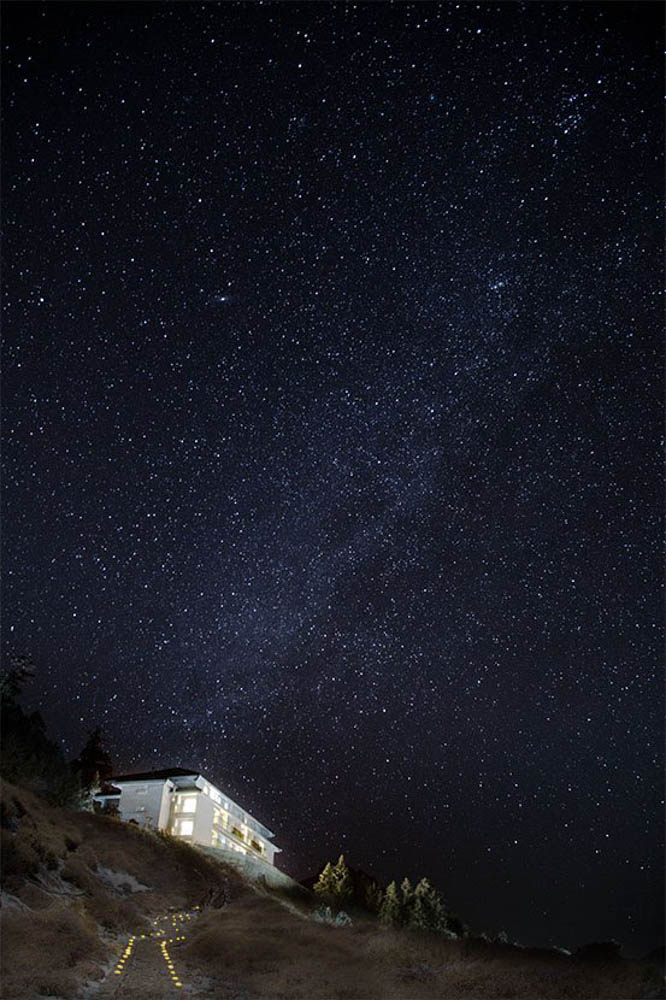
The spectacular starry night and star trails sometimes need a foreground element to enrich the composition. Apart from using the illuminating buildings as foreground subject as aforementioned, we can also light up an object with a torch.
Pay attention to the axis the stars rotate about as it affects the composition of your star trails photos much. As mentioned, the stars rotate about the north-south axis. So the photos we take towards the north or south direction will capture star trails in the shape of a circle. Photos taken towards the east or west direction will capture laterally moving star trails

Things to Note
Star photography depends a lot on the weather condition. Given the limited choices of shooting locations in Hong Kong (just a few popular locations with convenient transportation such as High Island Reservoir), there is high chance that a particular shooting location is crowded with people on a given day. Therefore, always arrive early in order to find yourself an ideal spot to shoot.
As star photography involves long exposure times, you should be aware that your lighting equipment doesn't affect the others when they are shooting. Besides, shooting in the dark can be dangerous. So pay attention to your own safety while enjoying your photo journey.
As star photography involves long exposure times, you should be aware that your lighting equipment doesn't affect the others when they are shooting. Besides, shooting in the dark can be dangerous. So pay attention to your own safety while enjoying your photo journey.