Skills for Capturing the Busy Night Traffic
Hong Kong remains a bustling city even at nightfall. The lighted up buildings, busy traffic, multicolored neon signs with people thronging the streets become the city’s unique and iconic nightscape. To capture beautiful night shots of this vibrant city, we have to know the place so as to decide what camera settings or shooting method work best for it. Let’s check out some of the useful skills and tips below.
Pick the Right Time to Shoot
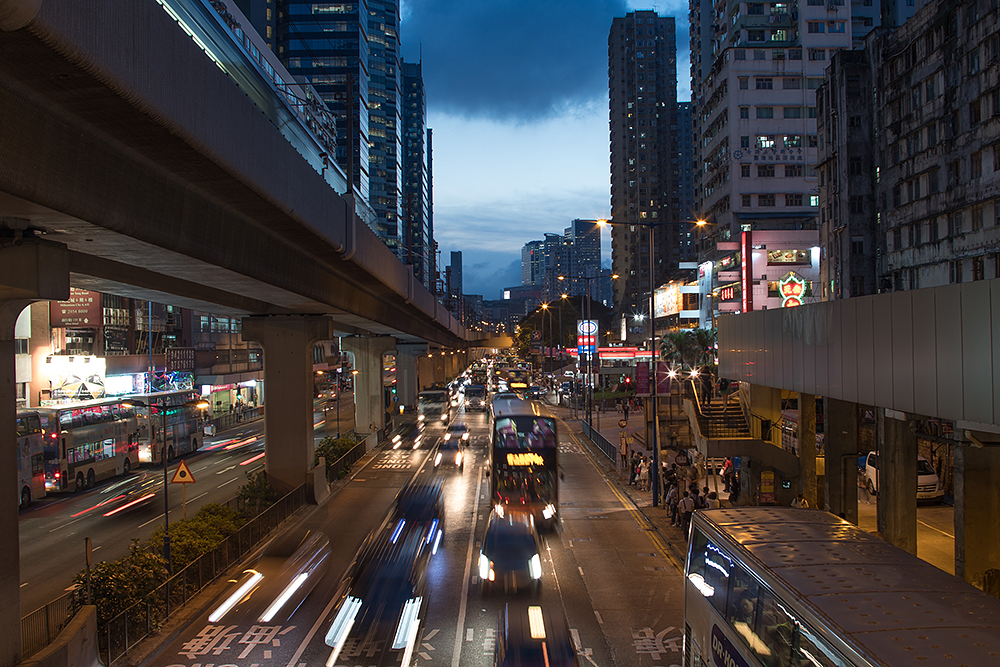
EOS 70D • EF-S 18-135mm f/3.5-5.6 IS • f/22 • 6s • ISO 100
The best timing for nightscape photography is within half an hour after sunset. This period of time before the sky turns into complete darkness with sunlight can still be seen is favorable for photography, as the lighting contrast between the foreground landscape and the sky remains low so more image details can be retained. Besides, the beautiful cool-hue dark blue sky before night is a nice contrast to the yellow street lamps, giving the photos a more appealing color combination. To learn more about the hue at night, please refer to the article “Seize the Best Timing to Shoot! Understanding the Change of Hue at Night”.
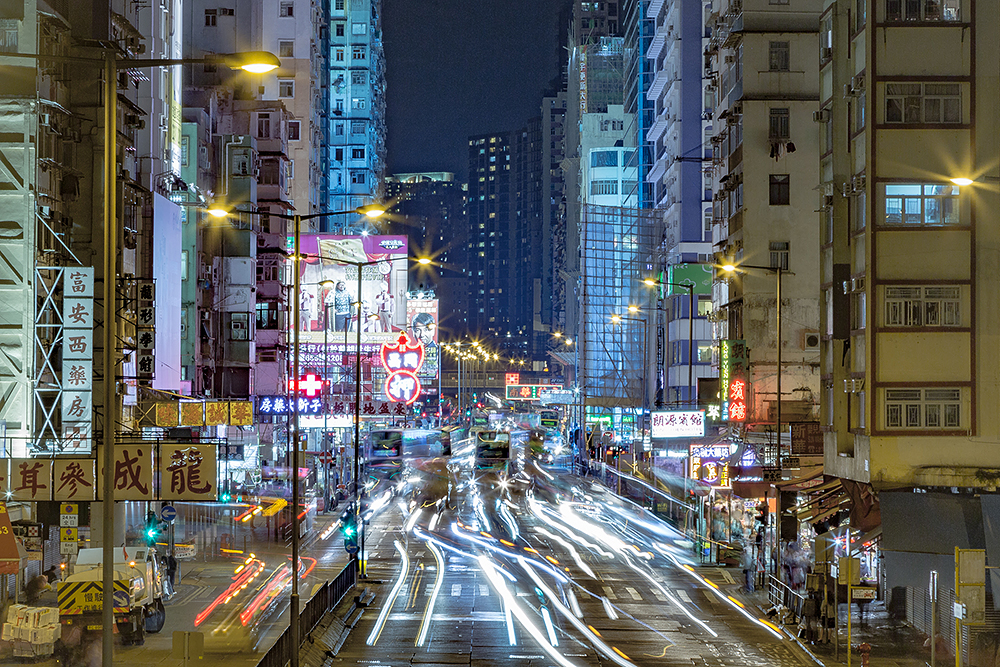
Capture the Bustling Nightscape with Overlapping Traffic Light Trails
Busy traffic is a common scene in Hong Kong at night. A long exposure (6s or above depending on the speed of car movement) combined with small aperture and low ISO setting will normally give you a pretty good shot. The aperture used will determine the thickness of the light trails, while the shutter speed affects the length and their patterns. For more spectacular result, you can overlay several images in post-editing to increase the amount of light trails. There are many free softwares available for overlaying image (e.g. Startrails). The software is originally developed for overlaying star trail images, but the same can be applied on traffic trails as well.
EOS 70D • EF-S 18-135mm f/3.5-5.6 IS • f/22 • 20s • ISO 100
Even though some long traffic trails are captured with a 20s exposure, the photo still doesn’t look rich enough
Even though some long traffic trails are captured with a 20s exposure, the photo still doesn’t look rich enough
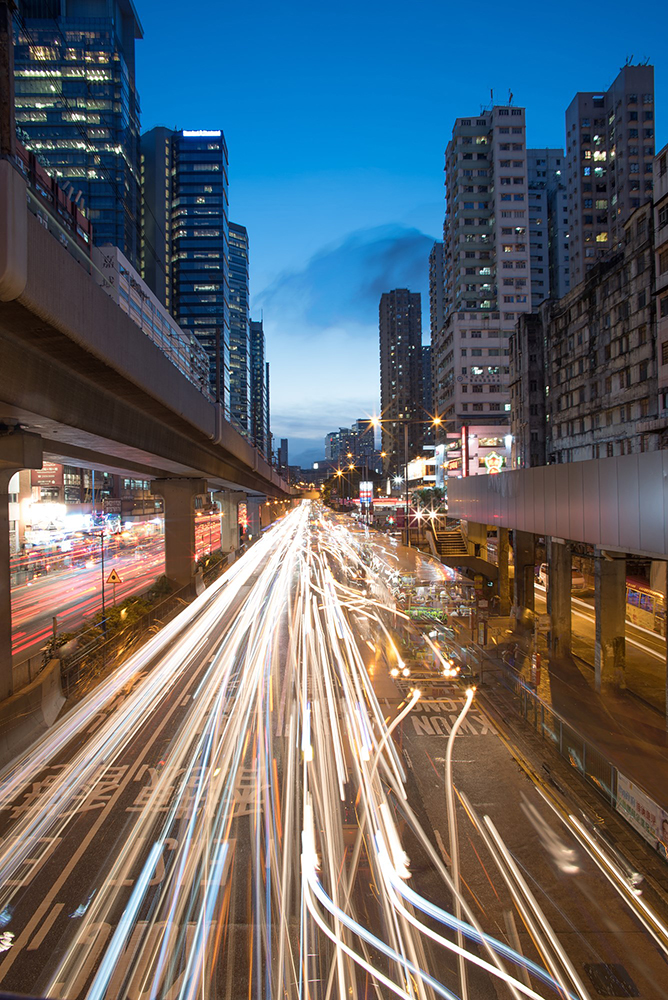
The photo is enriched by overlaying 6 images
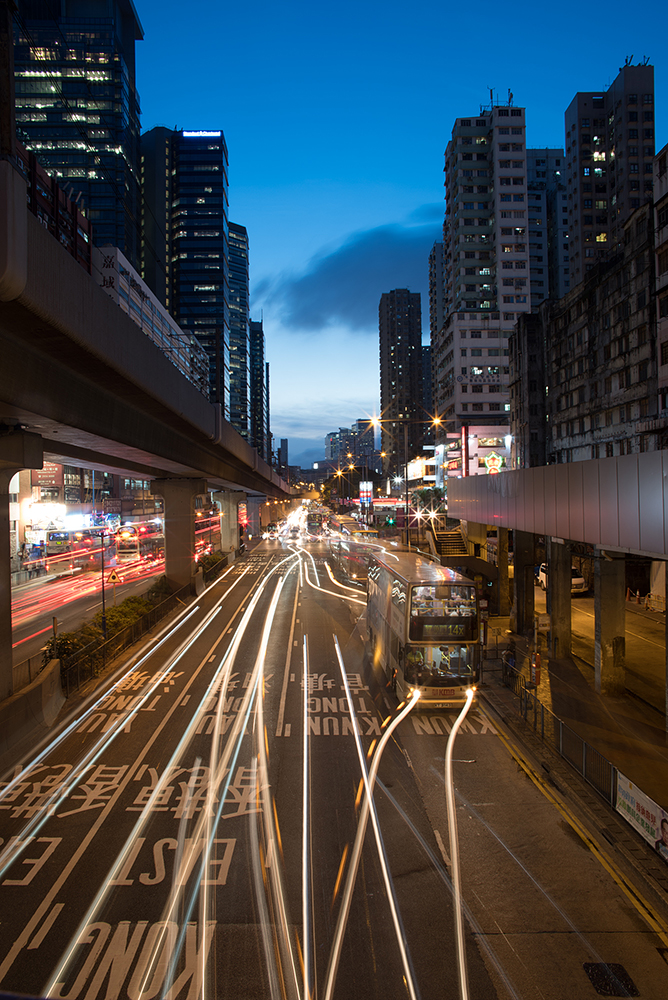
Footbridge is a common location for shooting traffic light trails. However, there will be slight shaking when the cars pass. So we don’t recommend to use a shutter speed that is too slow. In general, the use of a 6s shutter speed combined with the image overlaying technique will give a satisfactory result. Another thing we need to pay attention to is the colors of car lights. The headlights are either white or yellowish-orange in color while the rear lights are red. So pick the right direction to shoot if you have a specific color in mind.
Starburst Effect to Enhance the Stunning Nightscape
A technique frequently used in nightscape photography, starburst effect can turn the ordinary street lamps into star-shaped light spots in the photos. In order to achieve a wide depth of field and turn the dotted light sources into starbursts, we usually use a small aperture (e.g. f/11) and low ISO setting in nightscape photography. In general, the smaller the aperture, the more apparent the starbursts are. And the smaller the light source, the easier it is to create starburst effect.
EOS 70D • EF-S 18-135mm f/3.5-5.6 IS • f/4 • 1/2s • ISO 100
The street lamps on the right show a bit of starburst effect at f/4 aperture
The street lamps on the right show a bit of starburst effect at f/4 aperture

EOS 70D • EF-S 18-135mm f/3.5-5.6 IS • f/14 • 6s • ISO 100
The starburst effect becomes more apparent when the aperture is adjusted to f/14
The starburst effect becomes more apparent when the aperture is adjusted to f/14
Related Articles
Known as the “Pearl of the Orient”, Hong Kong has one of the most beautiful city nightscape in the world! To many photo beginners, nightscape photography is a rather difficult topic to master. Check out this article for a complete beginner’s guide covering tips on camera settings...