Guide to “Mirror of the Sky” Photography
Salar de Uyuni in Bolivia is for sure a destination that tops the list of photo enthusiasts to visit in a lifetime. The stunning image of this heaven-like place where the sky is perfectly mirrored is simply impressive and breathtaking. We don’t have to travel a long way to South America for scenery like this. If you look close enough, there are also places in Hong Kong where you can capture this kind of stunning “Mirror of the Sky” photos – all with a little tricks and techniques.
Calm Water Surface, Slow Speed Shutter and Use of Tripod
“Mirror of the Sky” photos are actually a kind of reflection images. The basic element that contributes to a “Mirror of the Sky” photo is a large reflection area – large enough to reflect the subject and a large piece of sky to become a mirrored image. A common way to achieve this is to photograph calm water or lake surface. The calmness of water is of paramount importance, as this directly affects whether the reflection can be clearly formed. As long as the sunlight is sufficient, we can capture a pretty good mirrored image with a simple press of the shutter. For more advanced photographers, try shooting on a tripod with a slow speed shutter to ensure proper exposure of the reflection. If using a tripod is not an option, try a higher ISO setting.
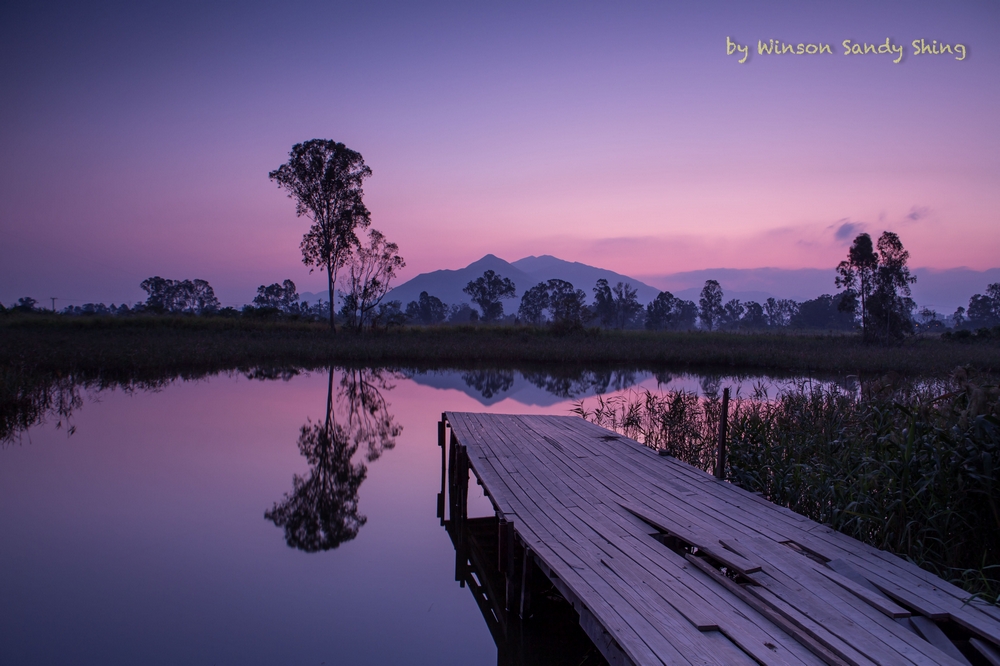
Title :《南生圍》 Club Canon Member:Shing CoCodog
EOS 5D Mark III • EF 24-70mm f/2.8L USM • 10s • f/8.0 • ISO 160
EOS 5D Mark III • EF 24-70mm f/2.8L USM • 10s • f/8.0 • ISO 160
Dividing a Composition in Half for Interesting Effect
“Mirror of the Sky” photo is a kind of mirrored image, and we can divide the composition in half to make a mirrored image look more interesting. Position your subject in the middle of the frame and try to include symmetric objects on the left and right sides so that there is a certain degree of symmetry across the four sections of the photo (top, bottom, left and right). Take the below photo as an example. Although the left and right sides are not in perfect symmetry, this composition with the pavilion surrounded by trees and red leaves on both sides makes it look balanced to the eyes. Even though only a small area of sky is captured and thus may not be classified as a “Mirror of the Sky” image, this photo still serves a very good example.
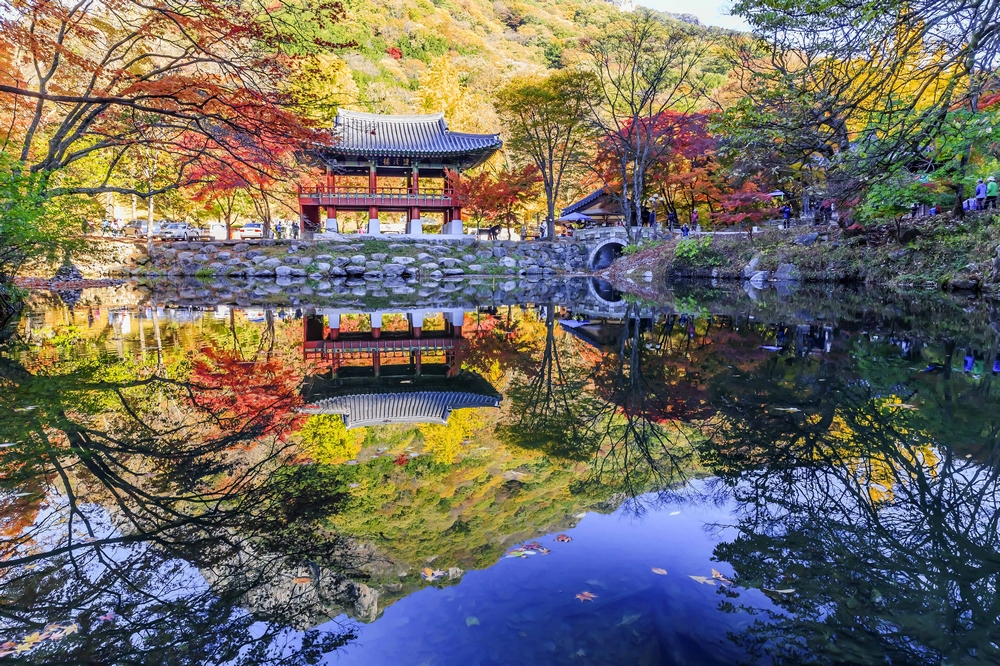
Title :《雙溪樓倒影》 Club Canon Member:肥仔愛旅行
EOS 6D • EF 24-70mm f/2.8L II USM • 1/25s • f/11.0 • ISO 1600
EOS 6D • EF 24-70mm f/2.8L II USM • 1/25s • f/11.0 • ISO 1600
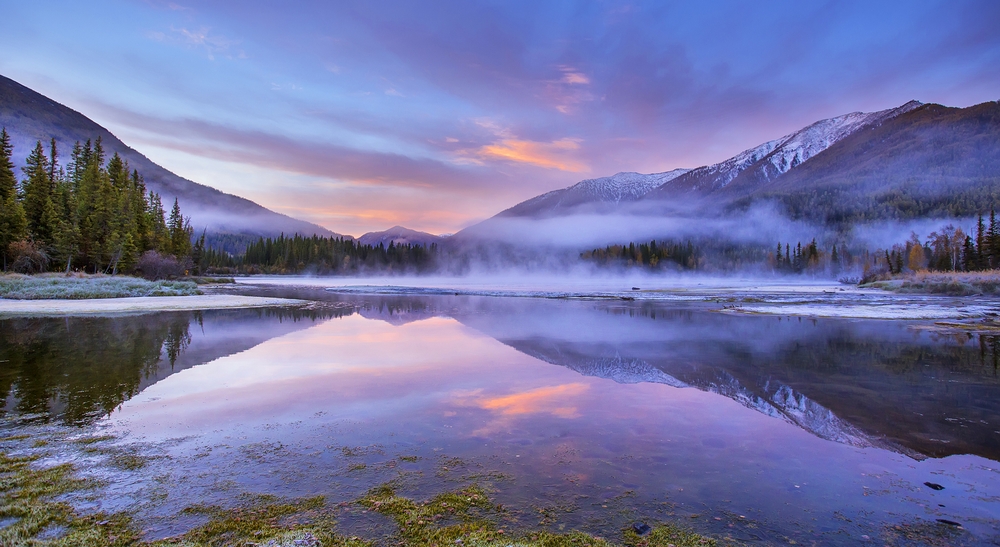
Balance the Brightness with a GND Filter
To photograph mirrored images, we usually shoot on a calm and sunny day. However, the direct light from the sky and the reflection of light off the water surface cause big difference in lighting contrast. This problem is more apparent especially in daytime, creating over-exposed sky when including both the sky and the reflection in one single photo. The simplest solution to this is to use a Graduated Neutral Density filter (GND filter) to balance out the brightness of the top and bottom sections. This can ensure rich image details in both the highlight and shadow areas.

Title :《在天空裡的瑜珈》 Club Canon Member:Dickey
EOS 5D Mark II • EF 24-105mm f/4L IS USM • 1/800s • f/14.0 • ISO 100
EOS 5D Mark II • EF 24-105mm f/4L IS USM • 1/800s • f/14.0 • ISO 100
Shoot with Front or Side Lighting for More Apparent Result
Although there is a trend of using back lighting to create low-contrast Japanese-style photos in recent years, front and side lighting are preferred when it comes to mirrored image photography. As the subject and reflection show different levels of brightness, the use of back lighting will result in loss of details in the highlight area due to the low contrast which violates our photo intention. Conversely, use of front or side lighting can bring out the gradation and sense of depth of objects, as well as retaining more image details.
Title :《秋紅》 Club Canon Member:Nelson Choi
EOS 5D Mark III • EF 16-35mm f/2.8L II USM • 1/50s • f/5.0 • ISO 800
EOS 5D Mark III • EF 16-35mm f/2.8L II USM • 1/50s • f/5.0 • ISO 800
Search for Mirror Surface other than Water Surface
Who says the reflection of water or lake surface is indispensable when creating “Mirror of the Sky” photos? Be creative and you can find other types of “Mirror of the Sky” images even in the city! For example, in the first photo shown below, the photographer made use of a car’s rear window to capture the reflection of vivid night sky. Not only was the window large enough, its curved surface also made the sky look more spectacular. In the second photo below, the photographer ingeniously captured the sky and its reflection off the glass walls of skyscrapers – some easy to find objects in the city. Unlike the clear and direct reflection of water or lake surface, the reflection off the glass walls with geometric elements adds an extra dimension of creativity to the photo.
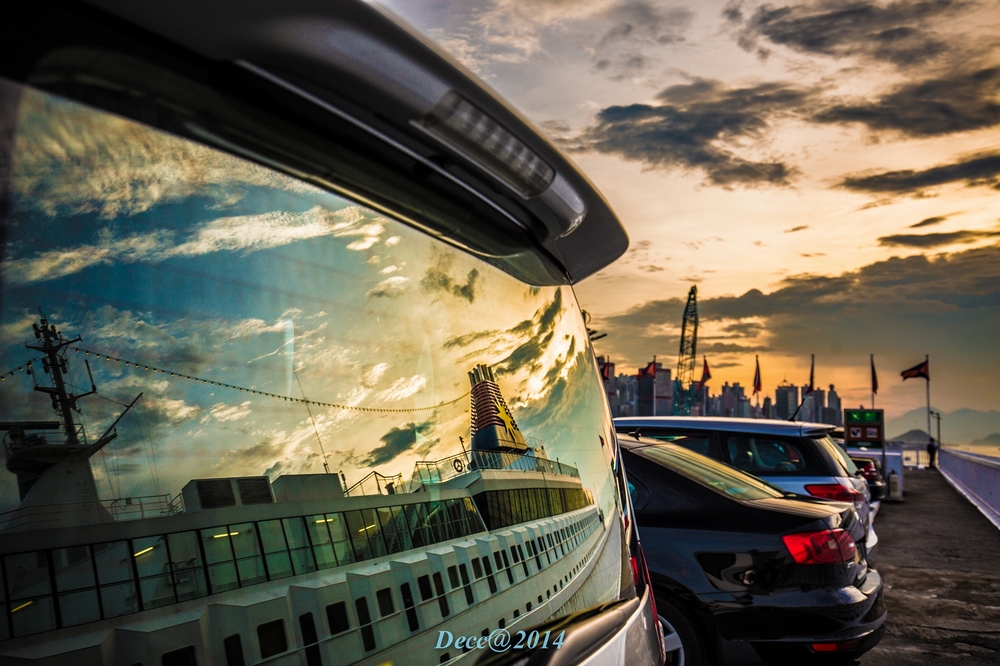
Title :《反影》 Club Canon Member:Decca Wong
EOS 5D Mark III • EF 16-35mm f/4L IS USM • 1/125s • f/4.5 • ISO 200
EOS 5D Mark III • EF 16-35mm f/4L IS USM • 1/125s • f/4.5 • ISO 200
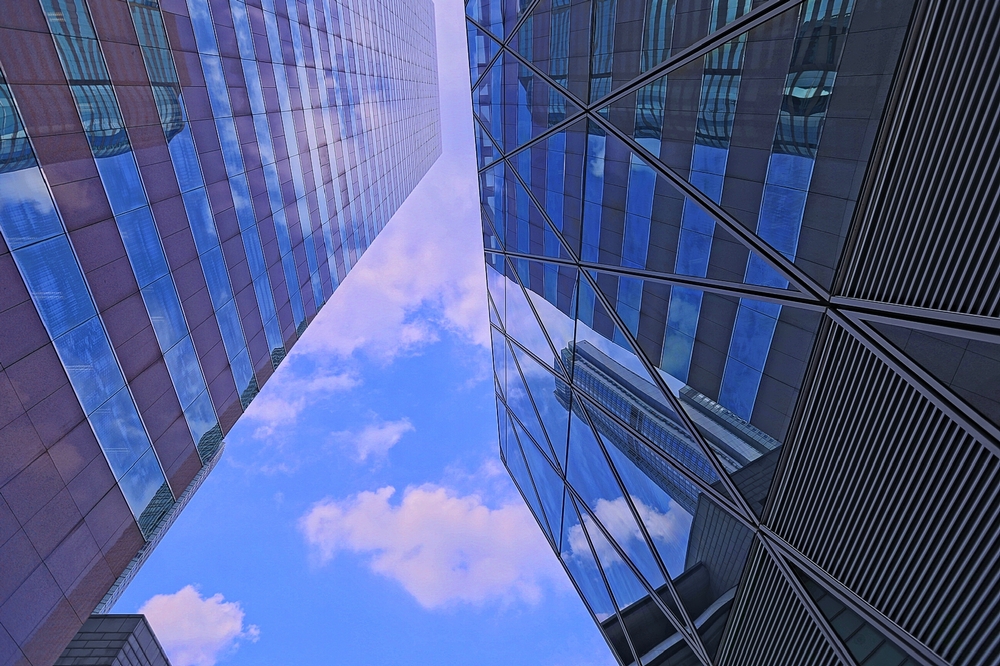
Title :《欣賞城市新角度》 Club Canon Member:Cathy Tang
EOS 6D • EF 16-35mm f/2.8L II USM • 1/320s • f/3.5 • ISO 100
EOS 6D • EF 16-35mm f/2.8L II USM • 1/320s • f/3.5 • ISO 100
Beautiful “Mirror of the Sky” Images are Everywhere
We all know that the original “Mirror of the Sky” image comes from Bolivia, but here in Hong Kong we can also take beautiful shots that are very “Mirror of the Sky”. Some feasible locations include the Pavilion of Harmony in the Chinese University of Hong Kong, the marble veneer at Tamar Park Admiralty, Tai Sang Wai in Yuen Long, Lau Shui Heung in Fanling and Western District Public Cargo Working Area. Fabulous images of a mirrored sky can be easily captured as long as you shoot in the right place, weather and time!
Related Articles

The world of photography is full of possibilities. While some are fascinated by the excitement of high-speed photography, others may indulge in the tranquility of photos captured using slow-speed shutter. The image and mood created by a slow-speed shutter are uniquely charming. One-of-a-kind images that lie between the real and the virtual can be achieved by combining photo elements such as reflection and light traces.