Ball of Light Photography Guide
Light painting photography has been gaining popularity for a while now and should not be unfamiliar to photo lovers. This article will share tips on how to create “Ball of Light”, a kind of light painting that captures interesting 3-dimensional light ball on an image and is easy and fun to shoot with little requirement on equipment.
Tools and Preparation
“Ball of Light” is a kind of light painting. What we need is a tripod and a camera that supports manual adjustment on shutter speed. Besides, the below tools are also needed:
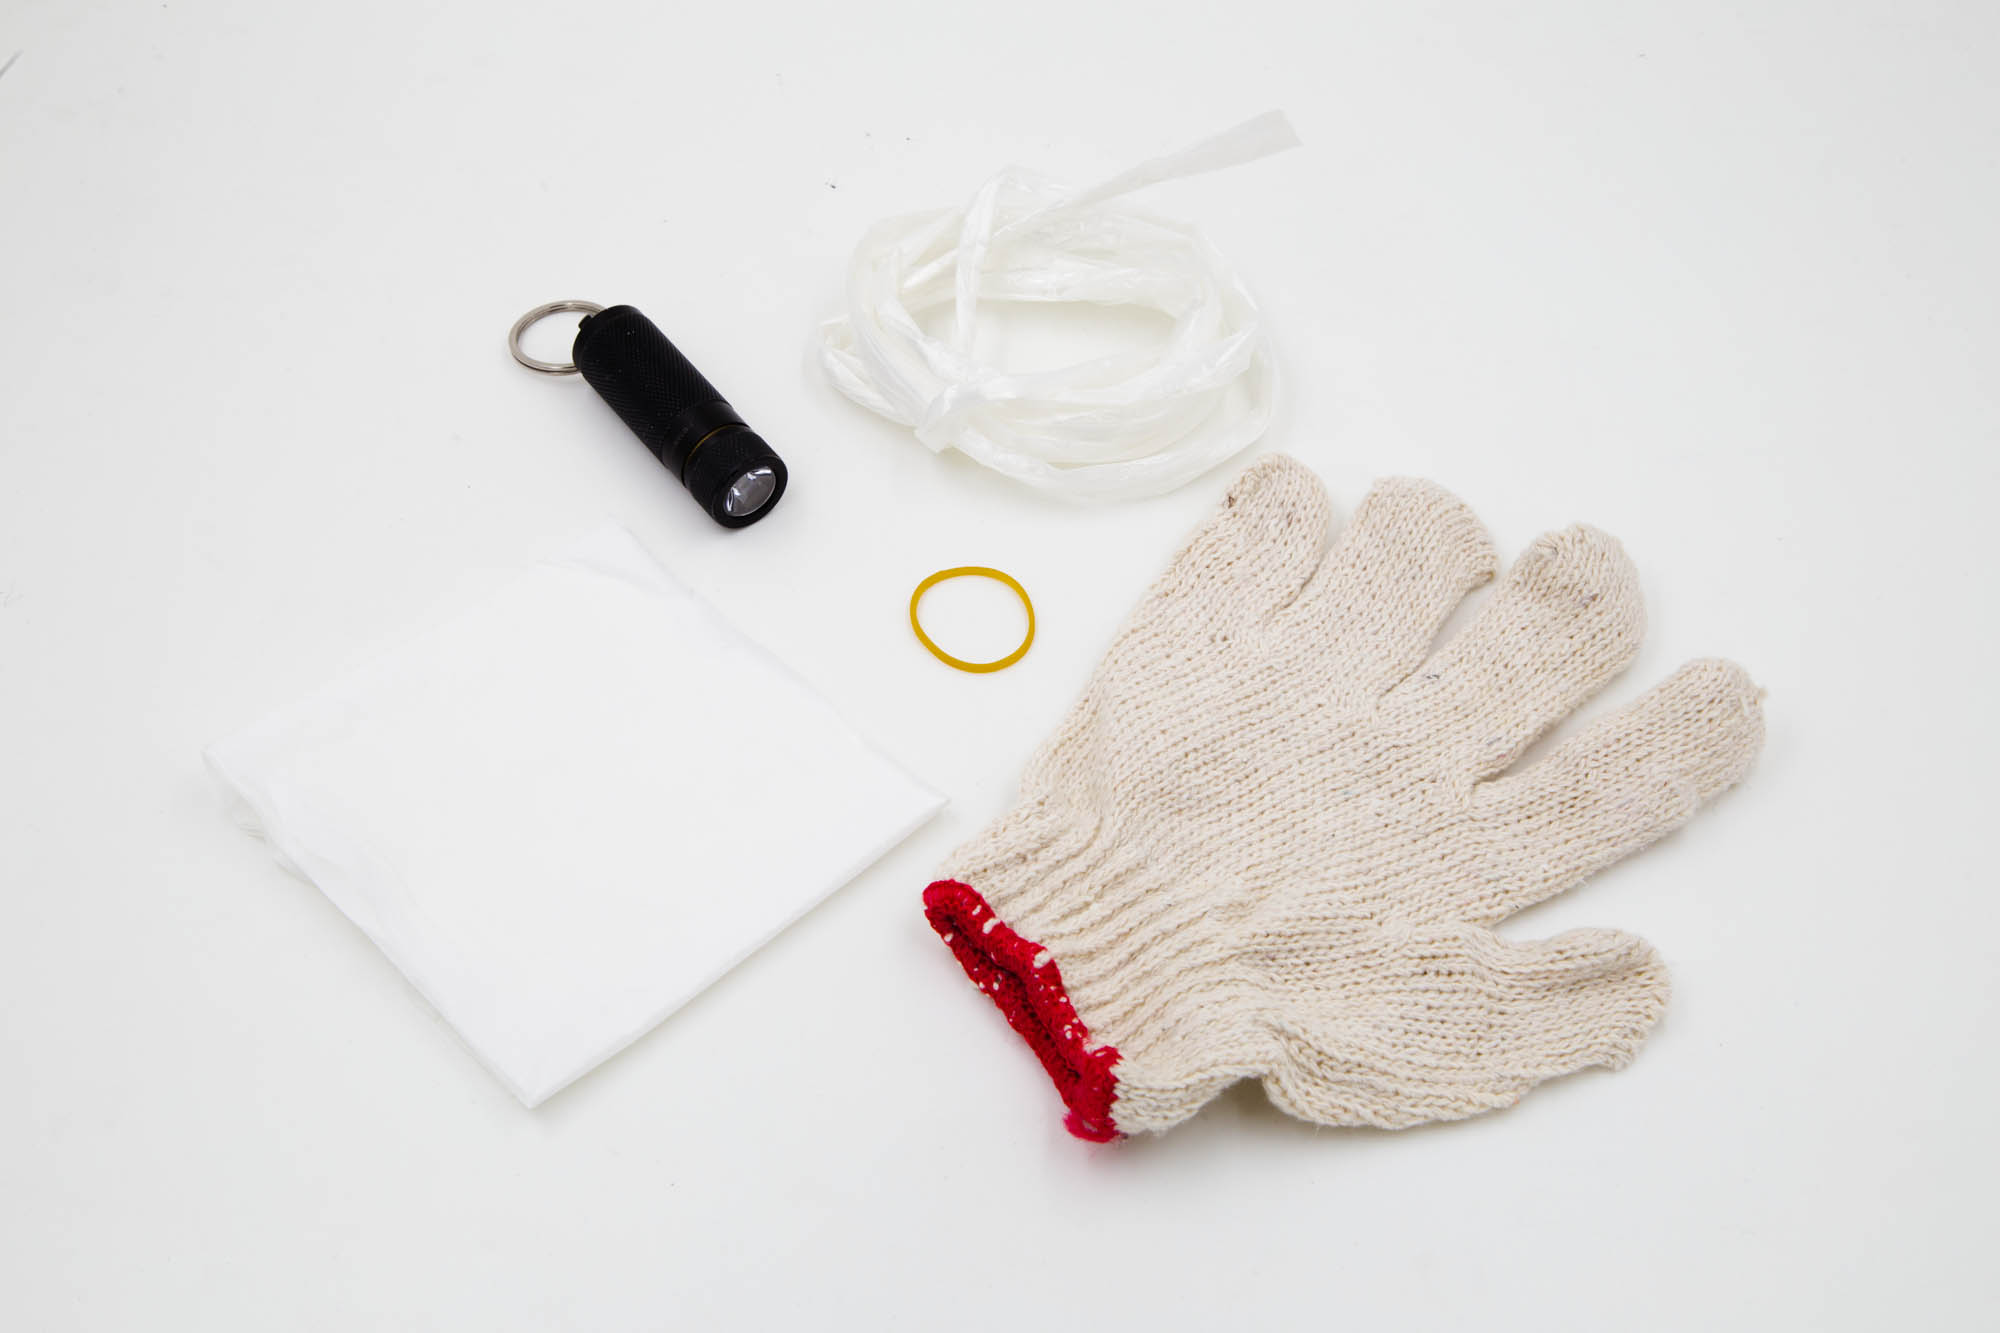
1. Mini torch x 1
2. String (around 1.5m long) x 1
3. Several pieces of tissue paper
4. Rubber band x 1
5. Glove x 1
First, tie the string to the torch. Cover the torch (the light-emitting end) with tissue paper and rubber band. Then push the tissue paper a bit away from the torch to make room for a larger luminous area.
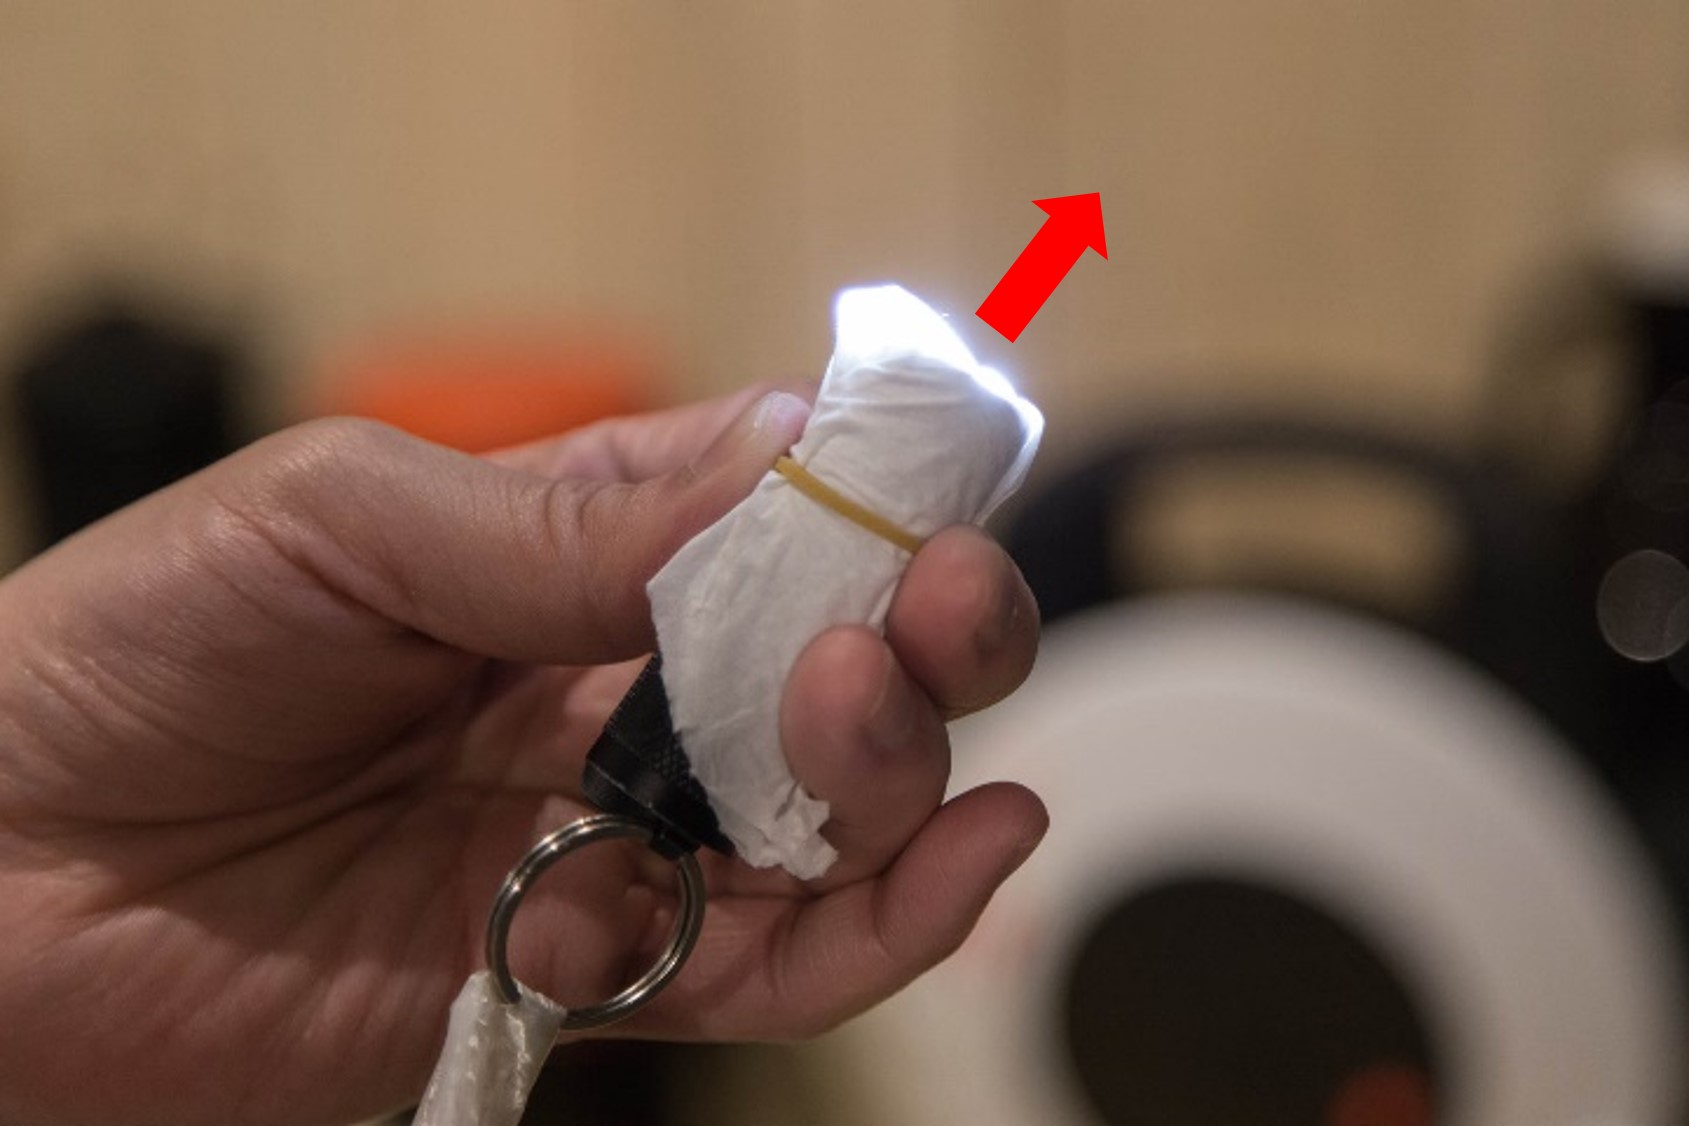
Push the tissue paper a bit away from the torch
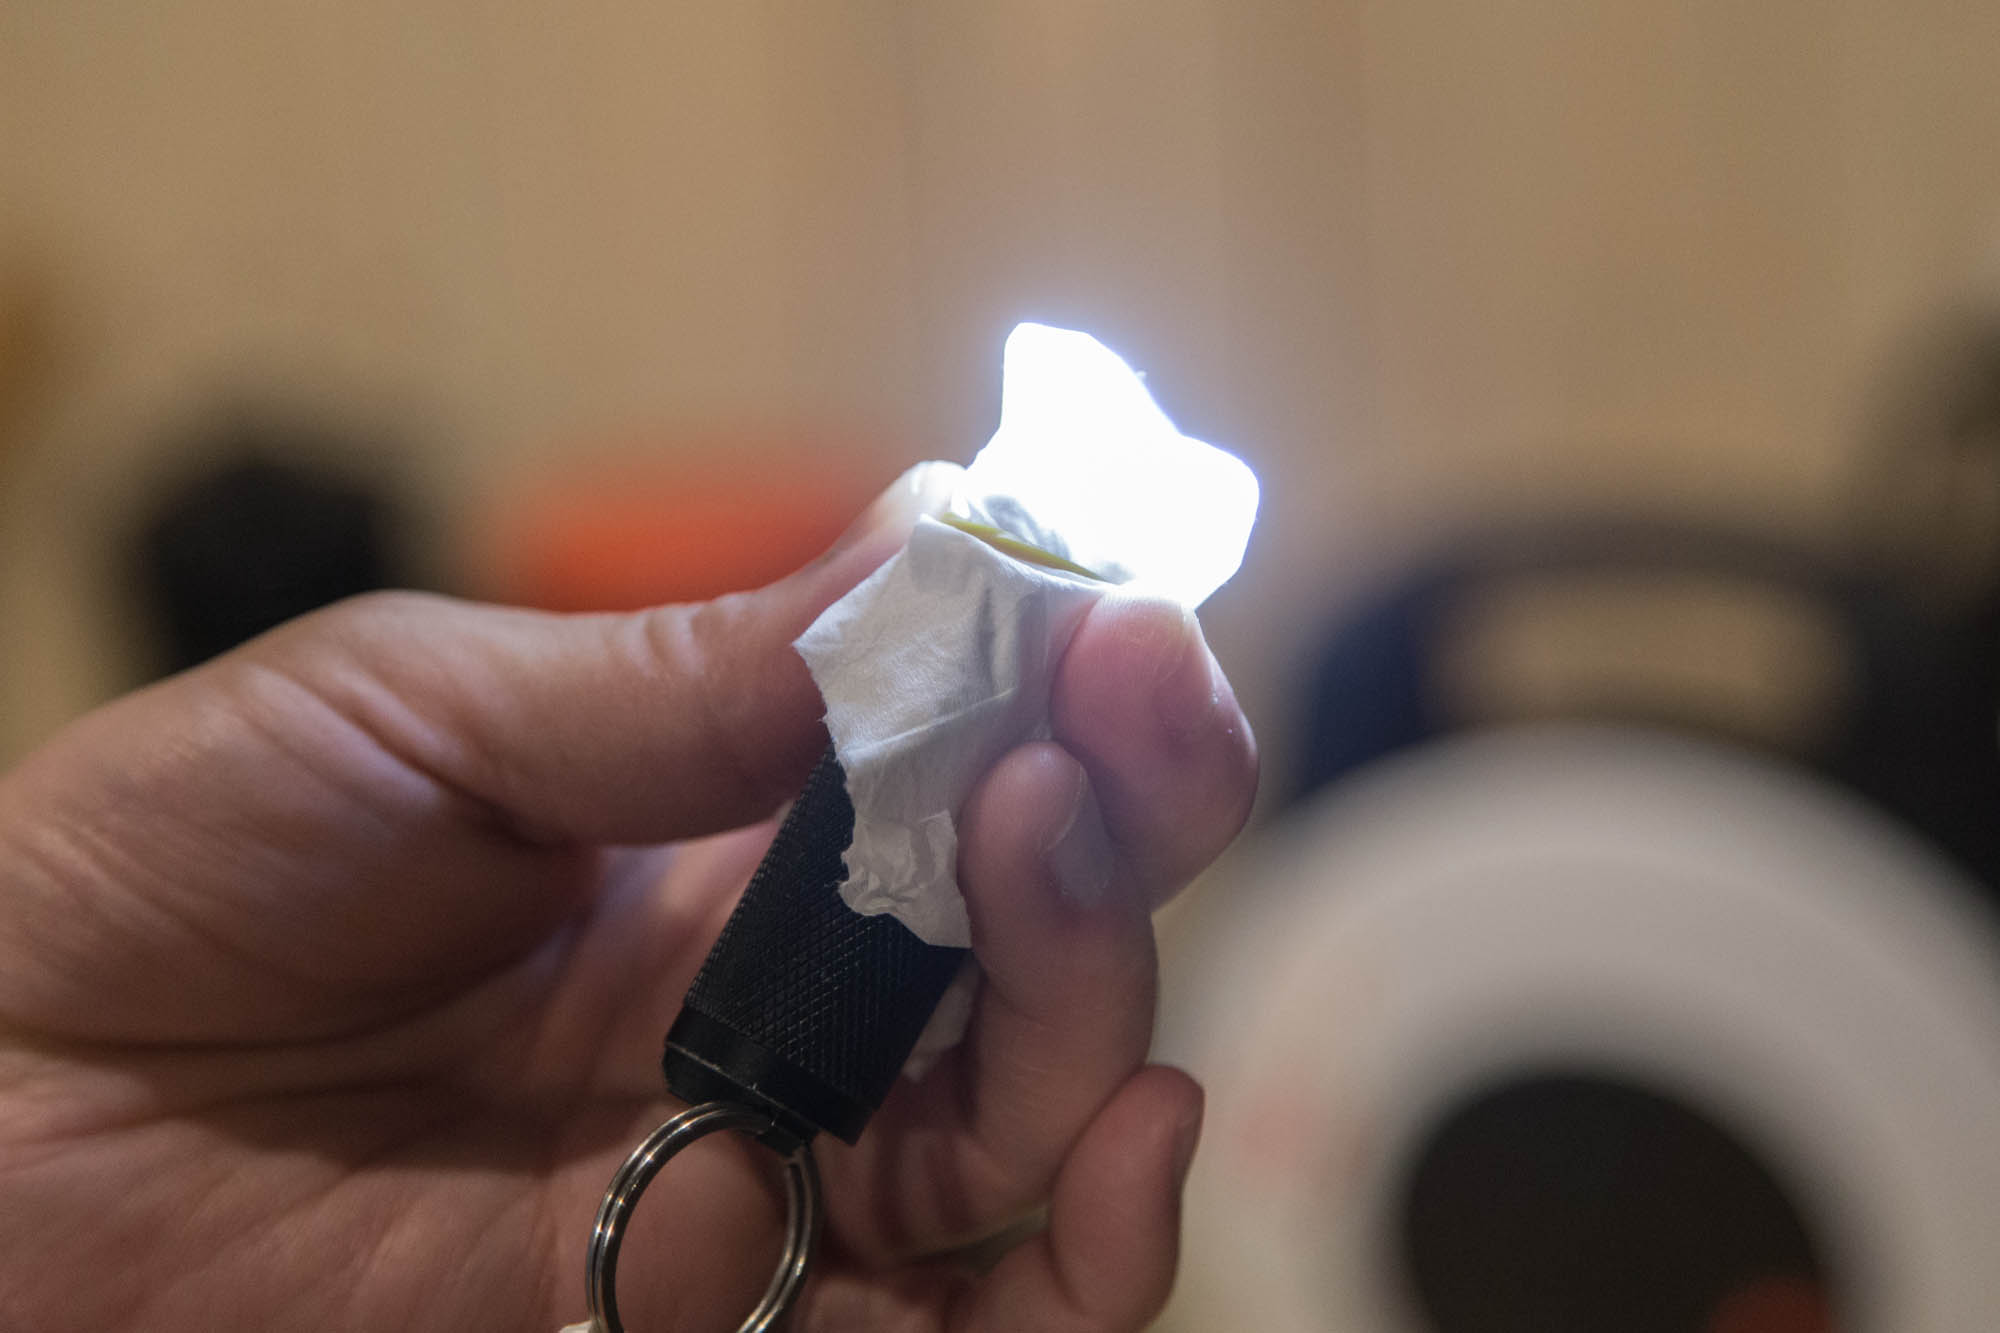
A larger luminous area will give more apparent lines for the light ball
Shooting Method
Draw a light ball
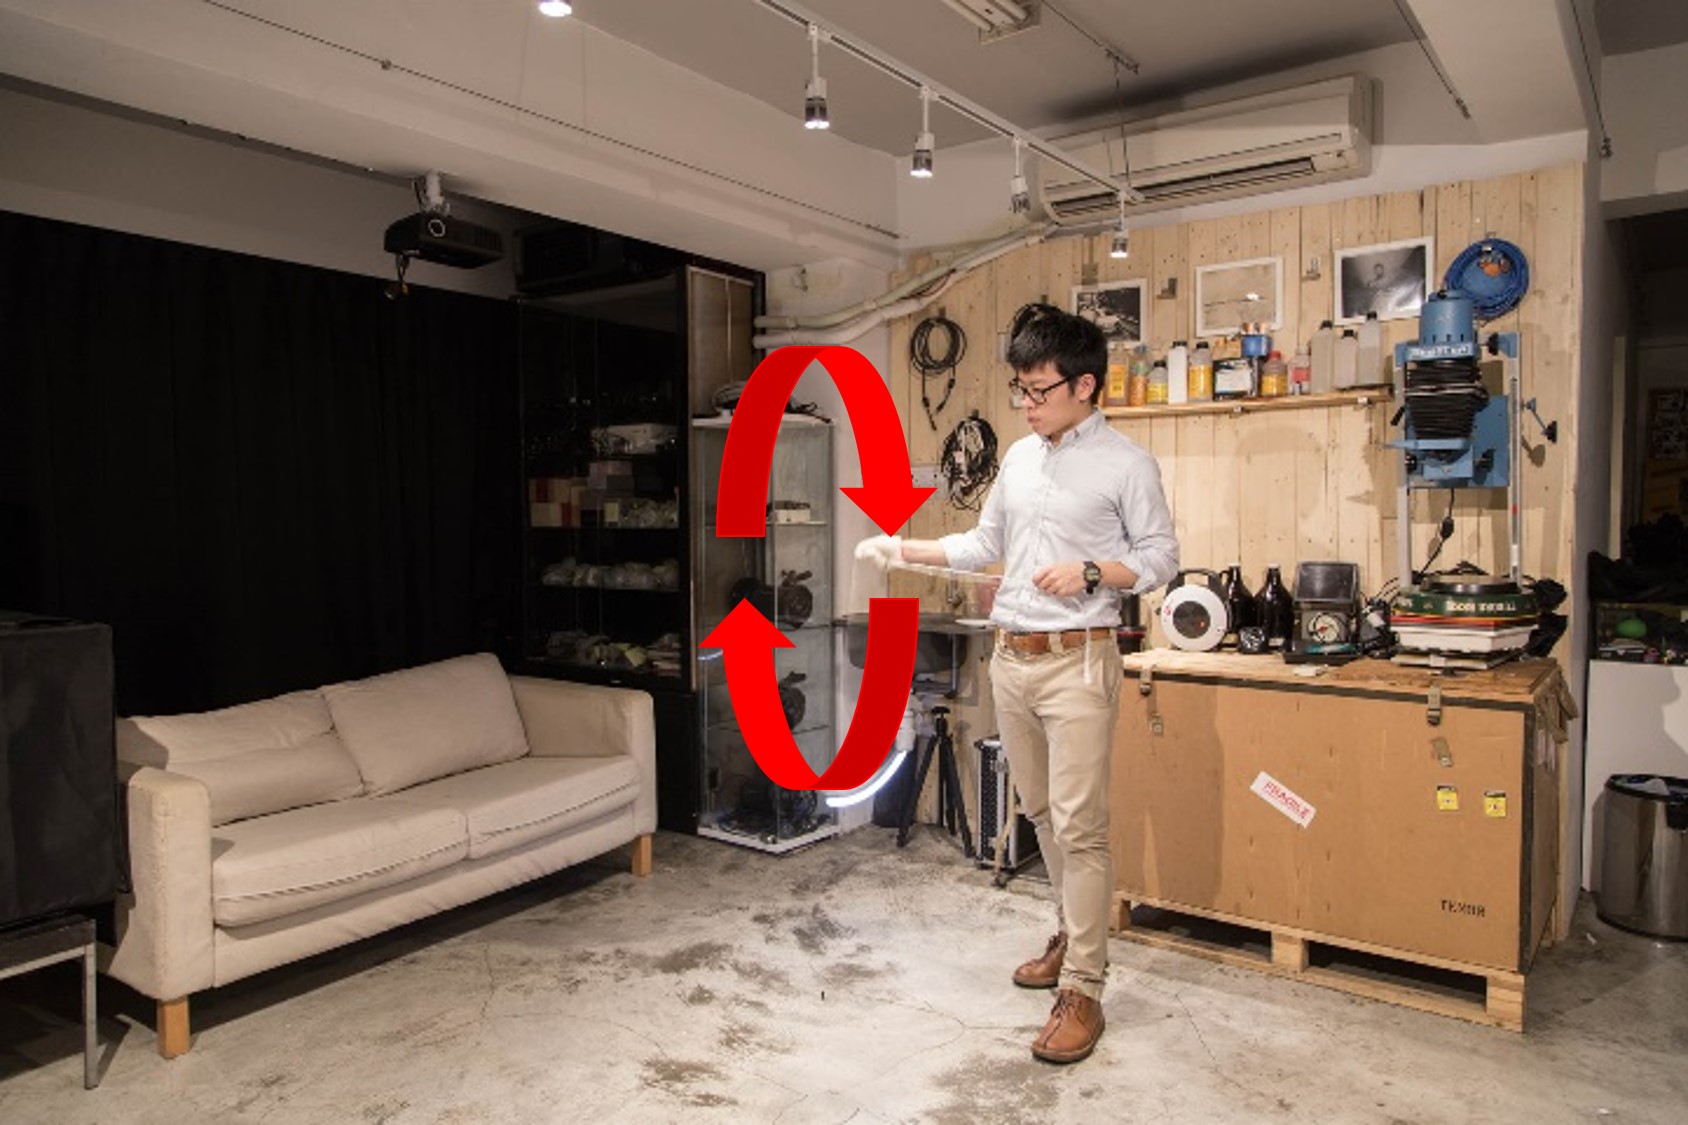
Keep your elbow by your waist and hold the string in your hand. Suspend the string from your hand by around 0.5m. Keep spinning the string by rotating your wrist in a circular motion and walk a circle with your wrist as the center point. The walking pace depends on the shutter speed used. Finish a circle before the close of shutter.
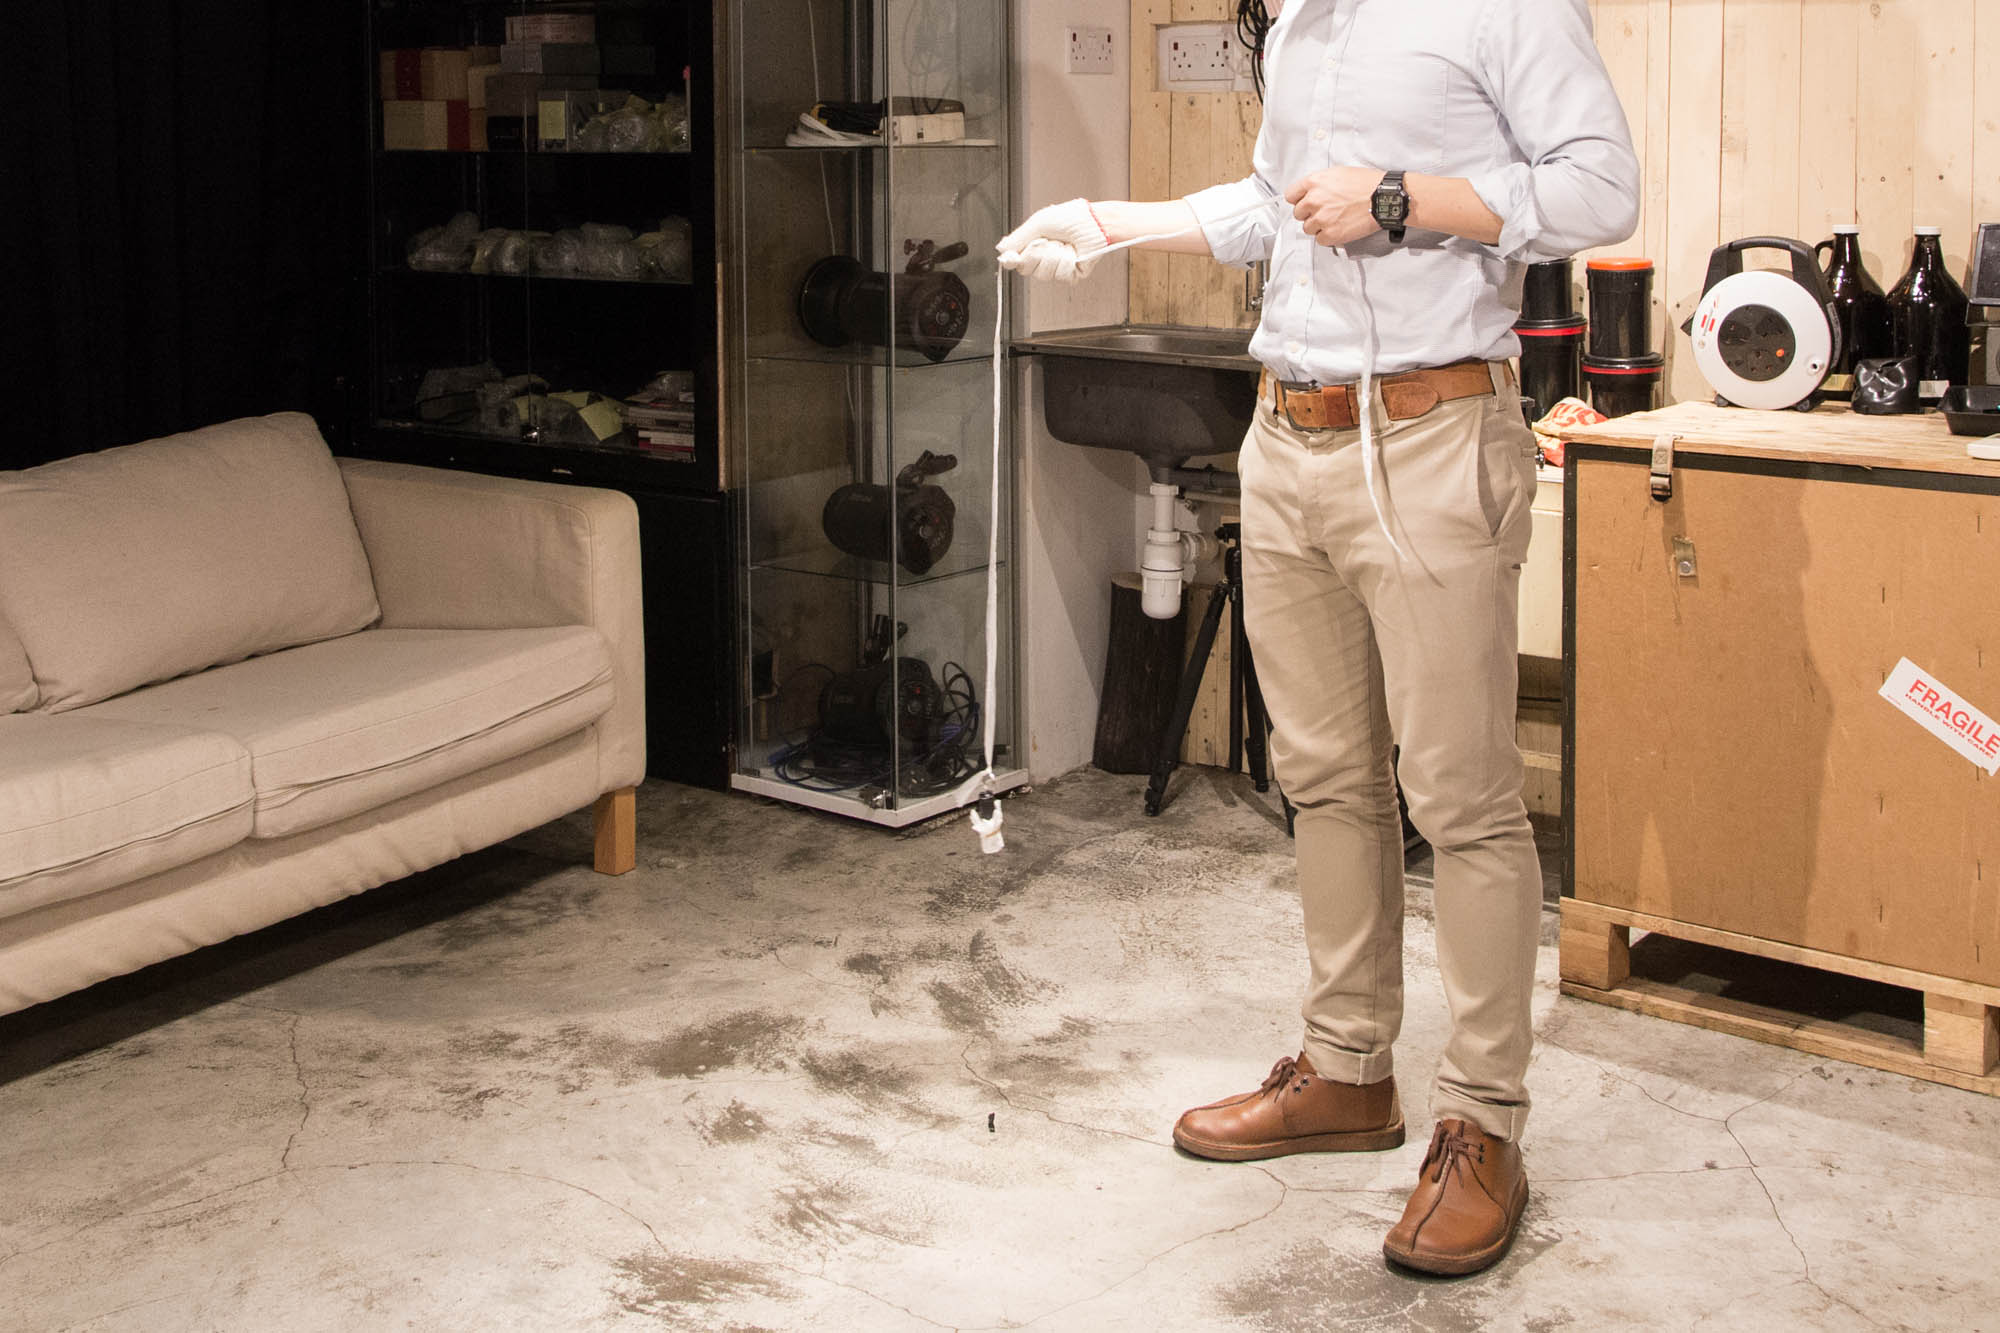
Suspend the string tied with the torch by around 0.5m
With centrifugal force, you can easily spin the string and torch without applying much force from your wrist
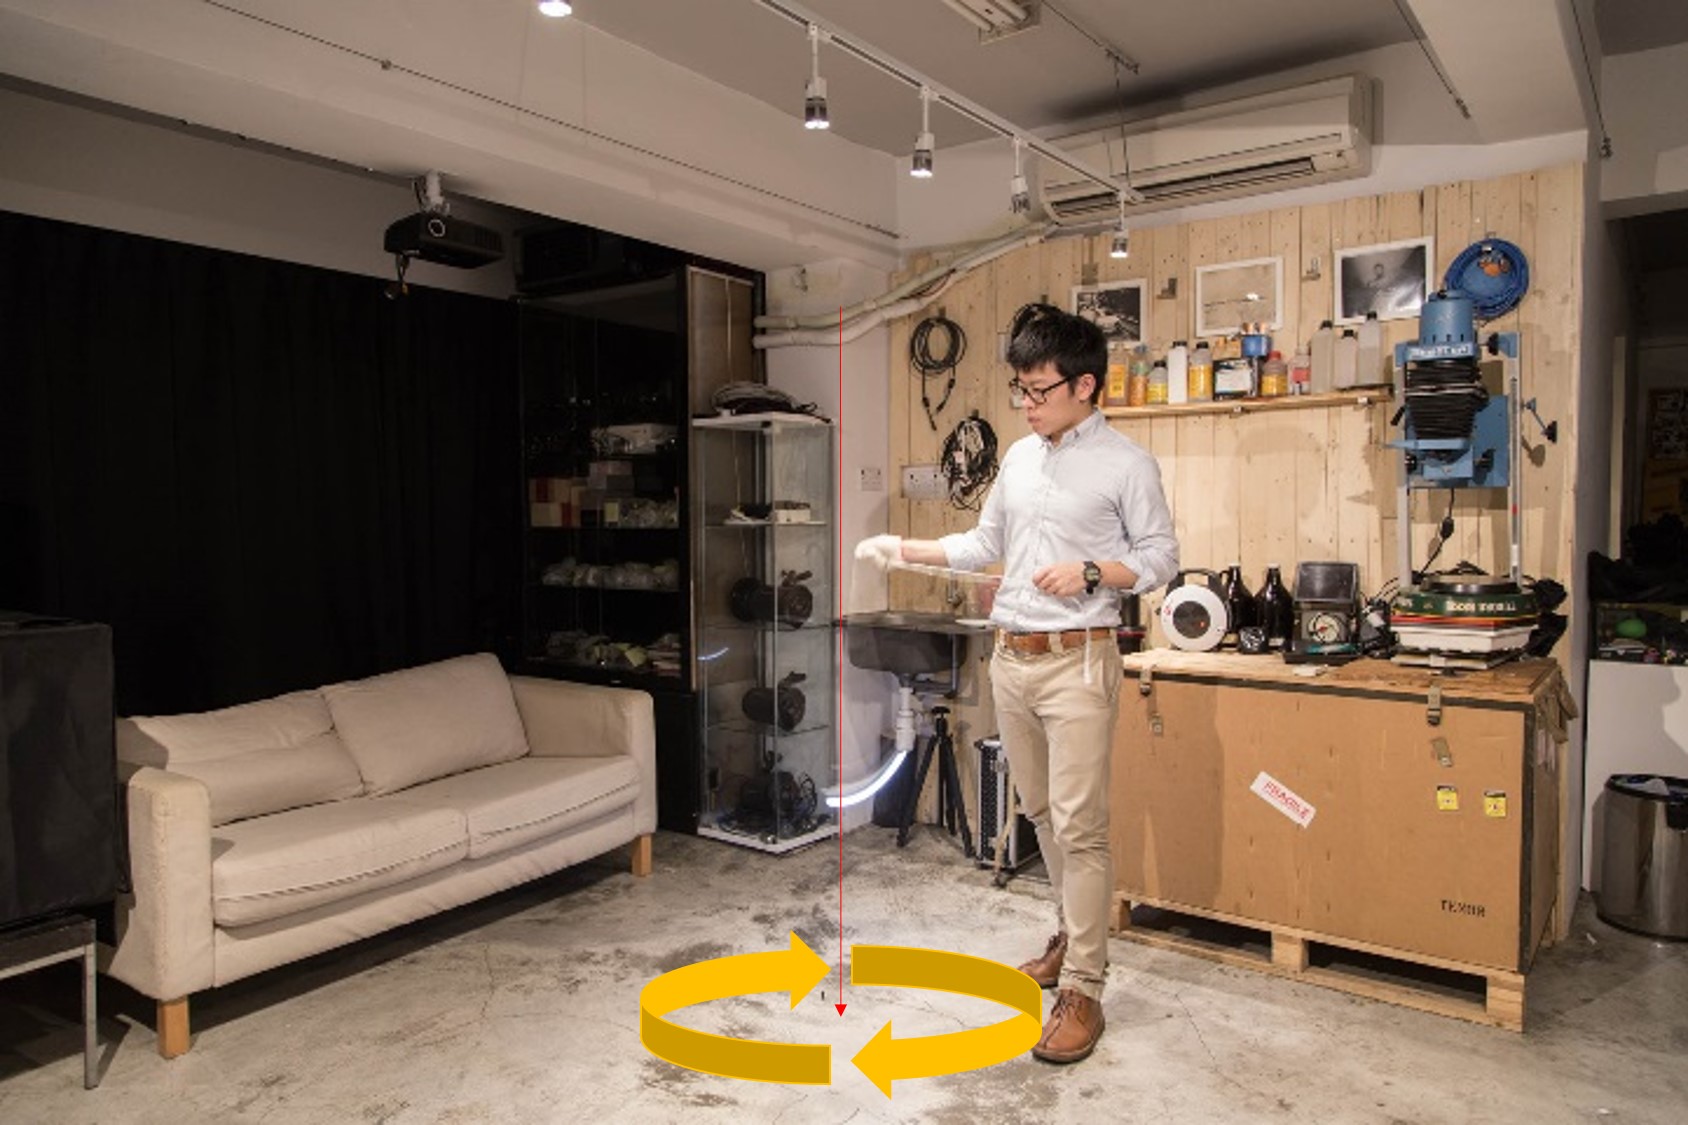
Walk a circle by using the wrist as center point
Camera settings
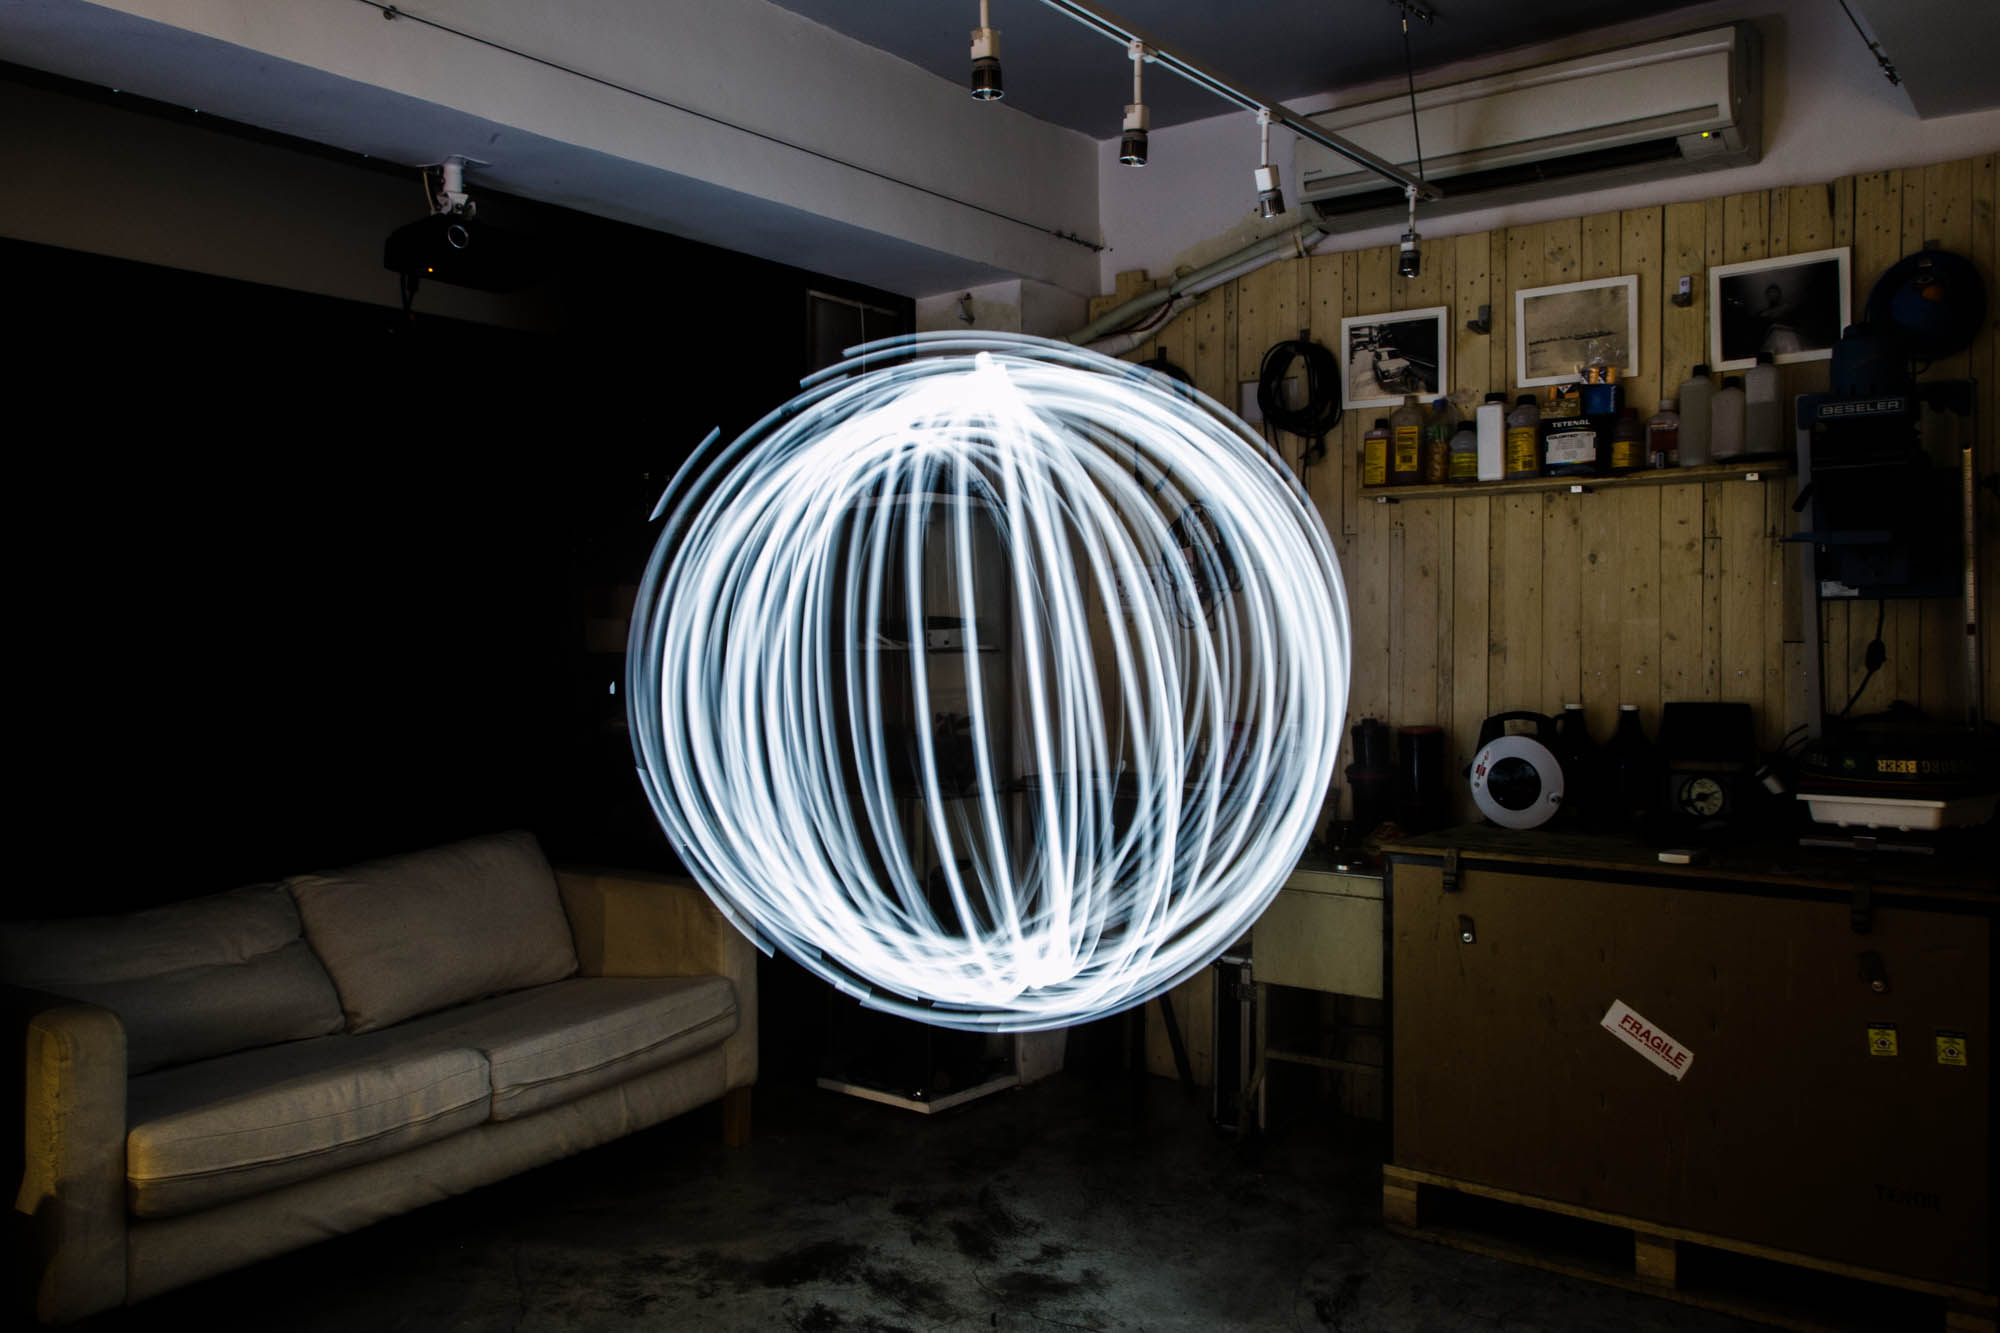
Switch the camera to M Mode for manual exposure. A minimum shutter speed of 20s is recommended so that you will have enough time to walk. Set the ISO speed and aperture according to the ambient light intensity. For a dim indoor environment as shown in the photos below, the camera settings are – shutter speed: 20s; aperture: f/8; ISO 100.
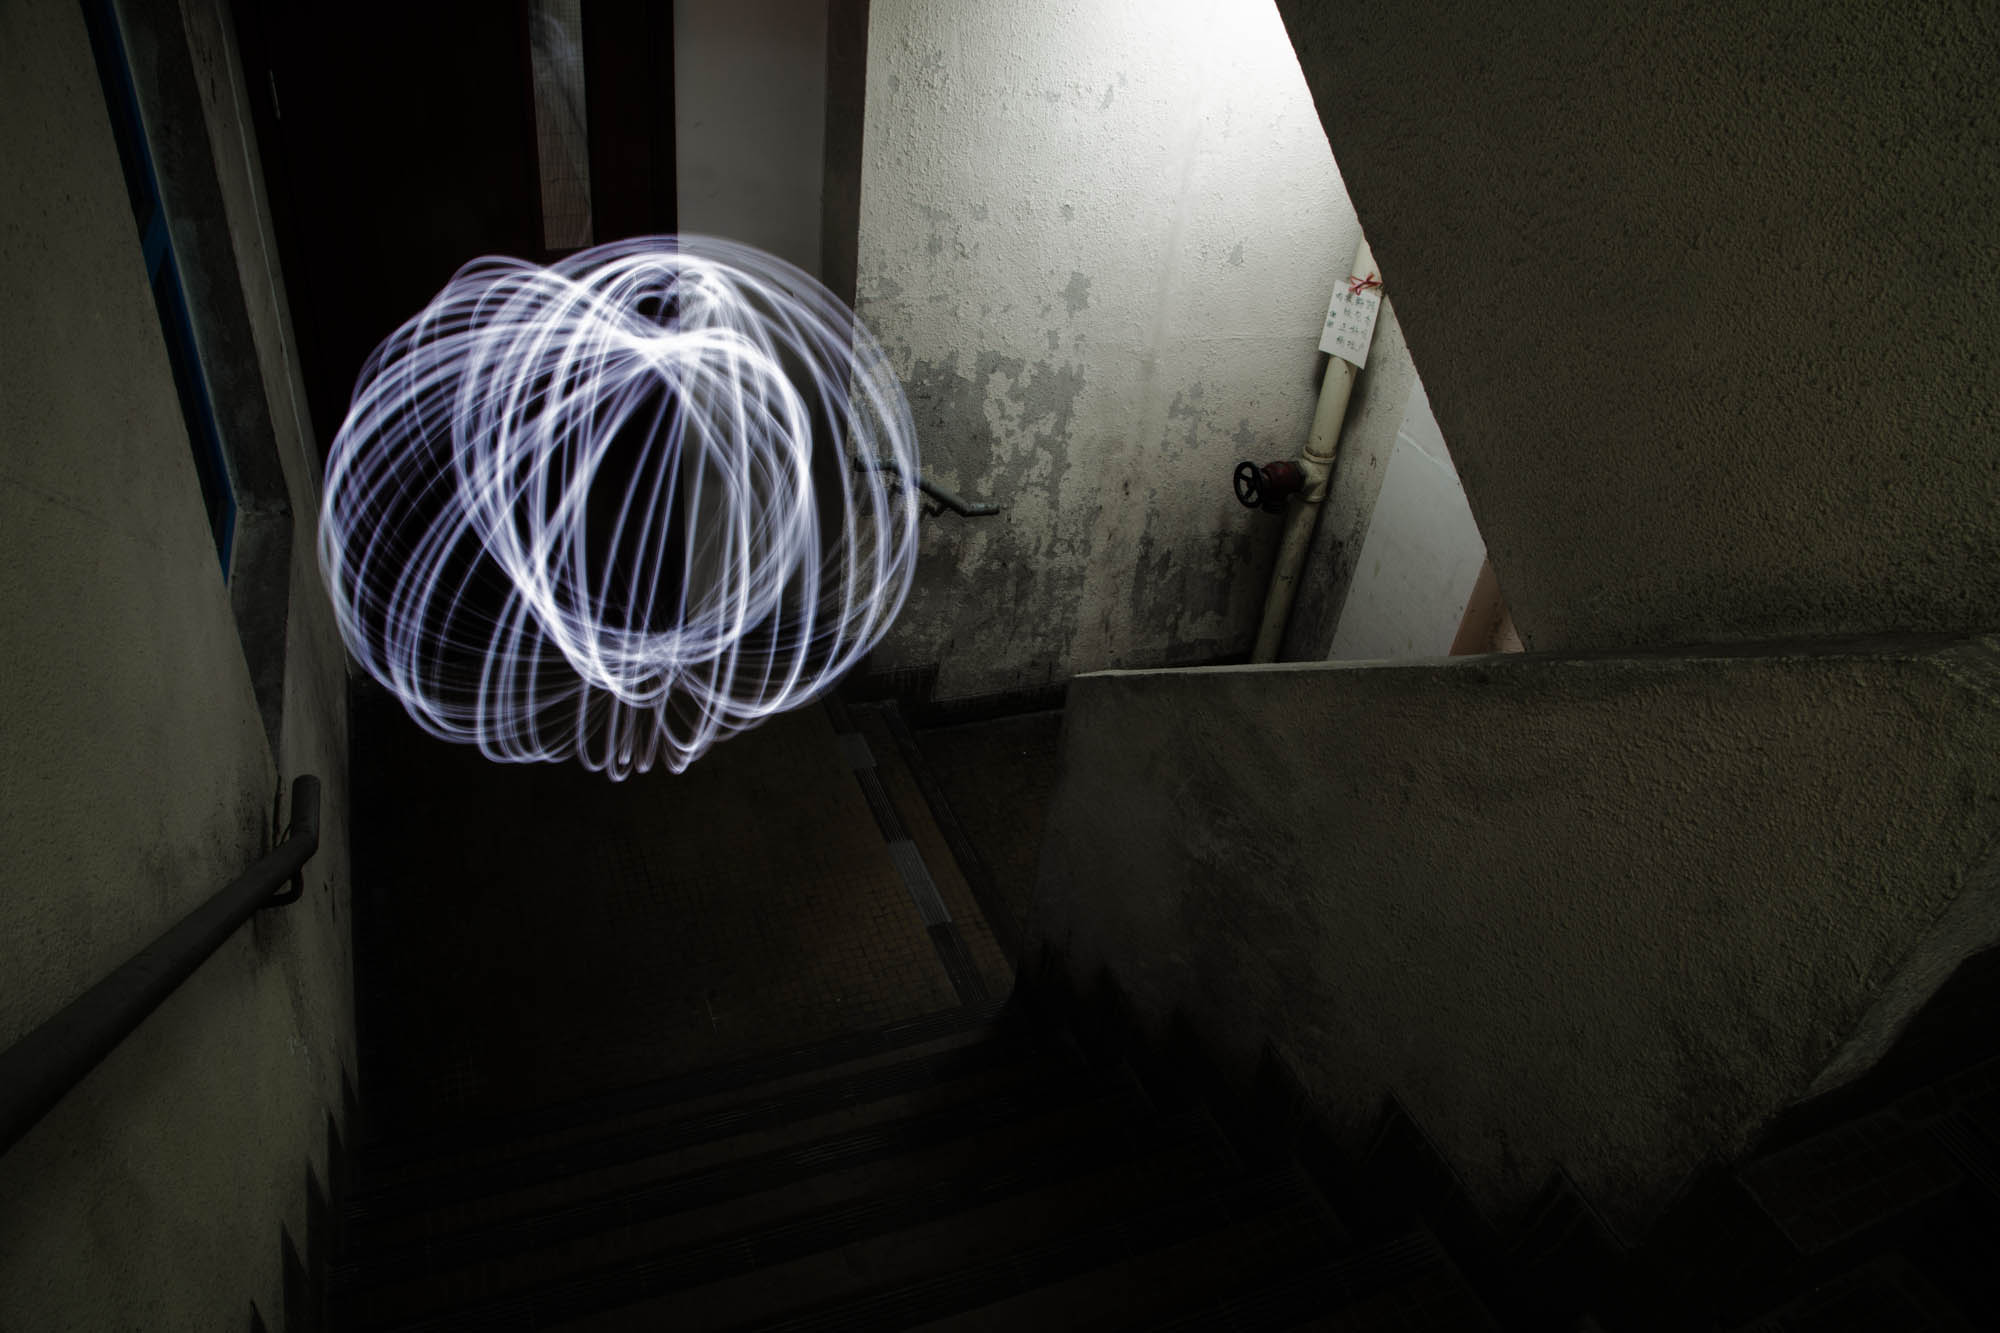
The Principle
A slow speed shutter (i.e. long exposure) is used to capture the trace of light. When we spin the torch tied on the string and capture it with long exposure shooting, we will get photo that shows a 2-dimensional circle, with the length of string being the radius of the circle. If we walk a circle around the center point at the same time, the photo captured will show a 3-dimensional circle formed by many 2-dimensional circles at various angles.
Other Tips
1. Put on a glove
Spinning the string at high speed may scratch the wrist. Put on a glove for protection.
2. Replace tissue paper with colored cellophane paper
Normally the light emitted by a torch is either white or yellow. For more color variations, we can cover the torch with colored cellophane paper instead of tissue paper.
3. Put marking on the floor
The biggest challenge for most people who try photographing light ball for the first time is how to walk a complete circle successfully, as this will determine whether a round, ball-like shape can be achieved. You can mark on the floor with adhesive tape at the place where the string hangs and walk around the marking to help achieve a complete circle.