Capture It Fast
A Guide to Lightning Photography
Among all natural landscapes, lightning is probably the most surprising and rewarding type of photography because it’s unpredictable. We never know where it appears and have no control on its brightness and intensity. It varies in location and shape each time so the picture we get is always unique. Although there are a lot of factors out of our control in lightning photography, the tips below can help in capturing a great shot of lightning.
Safety First
You are always at some risk when photographing lightning. Before we start, do remember to put safety first. While in general it’s quite safe to shoot from an indoor area, if you are out you should avoid places like rooftop or open field. If necessary, you can use a timer shutter release or conduct Live View Shooting from your mobile phone through the new “Camera Connect” App for safer operation.
Camera Setting for Lightning Photography
Lightning comes and goes. It’s impossible to make a decent capture by pressing the shutter when you see a flash. In fact, we don’t have to race with time to photograph lightning. A slow speed shutter and a lot of patience are what it takes. For exposure setting, in general a shutter speed of 3s – 8s is long enough to capture a lightning from start to finish. If you use a longer exposure time, multiple strikes of lightning can be captured on the same image – a result similar to multiple exposures. ISO should be set to ISO 100 or 200 to reduce image noise during long exposure as well as to prevent the background from over exposure.
The aperture used will depend on the ambient metering. In principle, we would use an aperture 1/3 or 2/3 stop smaller than the ambient metering result. If the lightning intensity is high, a smaller aperture such as f/8 or f/11 can be used. If the lightning intensity is low, a larger aperture such as f/5.6 is also acceptable. Most importantly, we should use manual focus and set the focus to infinity. Otherwise the camera will search for the focus point every time it shoots, making a high chance of out of focus and resulting in a blurry image.
The aperture used will depend on the ambient metering. In principle, we would use an aperture 1/3 or 2/3 stop smaller than the ambient metering result. If the lightning intensity is high, a smaller aperture such as f/8 or f/11 can be used. If the lightning intensity is low, a larger aperture such as f/5.6 is also acceptable. Most importantly, we should use manual focus and set the focus to infinity. Otherwise the camera will search for the focus point every time it shoots, making a high chance of out of focus and resulting in a blurry image.
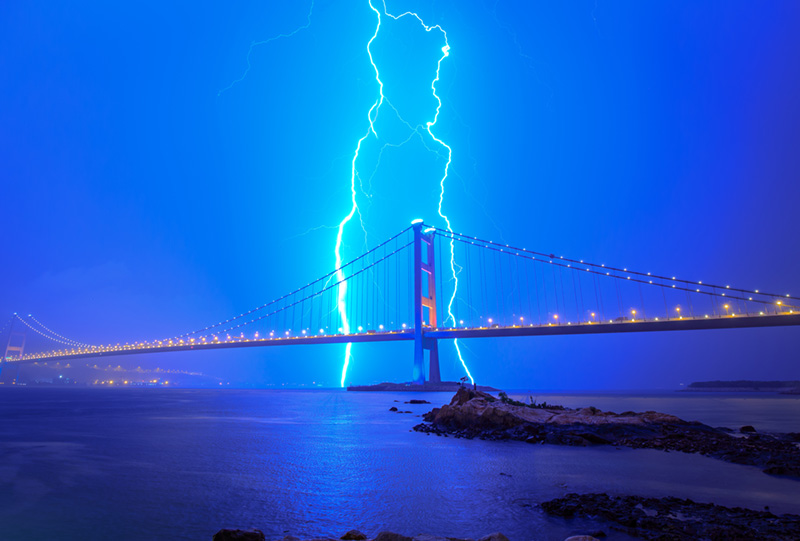
Adjusting the white balance can create mood for the photo. The cool, blue tones here match well with the cool image of lightning.
Title:《大橋光景 電光一瞬!!》 Club Canon Member:Pong Leung
EOS 5D Mark III • EF 16-35mm f/4L IS USM • 15s • f/10.0 • ISO 200
Title:《大橋光景 電光一瞬!!》 Club Canon Member:Pong Leung
EOS 5D Mark III • EF 16-35mm f/4L IS USM • 15s • f/10.0 • ISO 200
Use Interval Shooting Instead of Manual Shutter Release
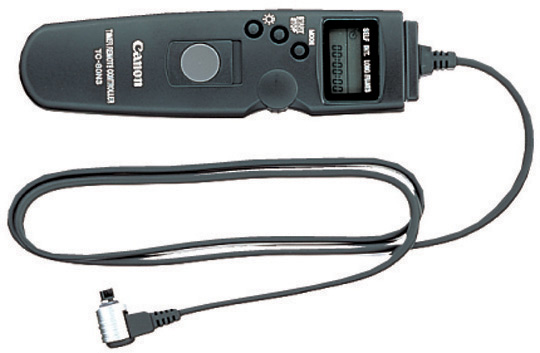
As mentioned above, we can only wait for the lightning to happen. So what is the perfect timing to press the shutter? While experienced photographers know their perfect timing to shoot, beginners can use a timer shutter release such as TC-80N3 for continuous shooting at selected intervals. Make sure that your camera is fully charged and the memory card has ample capacity for the recording. Besides, EOS 7D Mark II with built-in Interval Timer can allow users to set the shooting interval and the number of shots without the need of a shutter release cable.
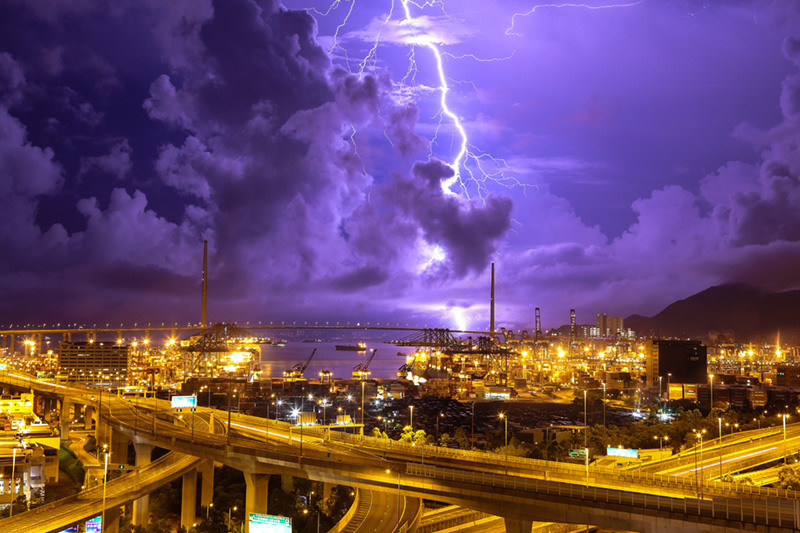
Title: 《閃電》 Club Canon Member: Earendil
EOS 5D Mark III • EF 24-105mm f/4L IS USM • 5s • f/9.0 • ISO 400
EOS 5D Mark III • EF 24-105mm f/4L IS USM • 5s • f/9.0 • ISO 400
The Importance of Composition in Advance
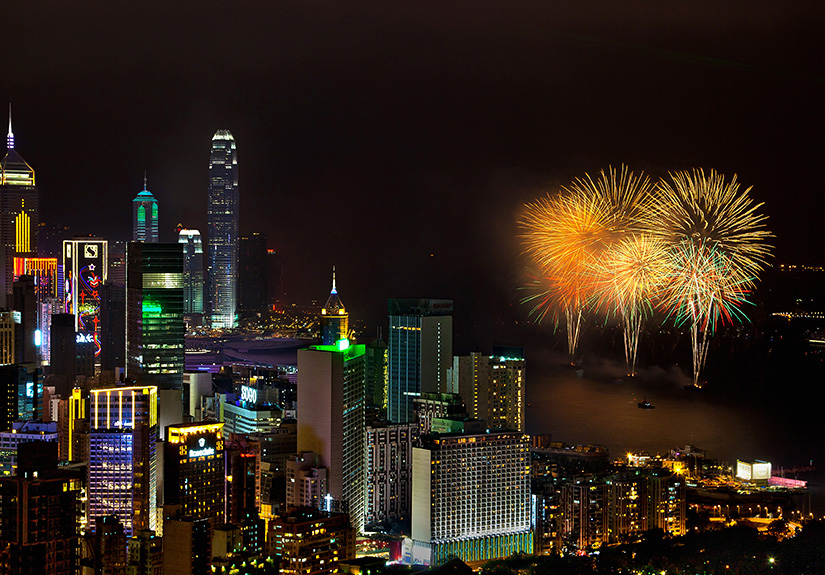
How can we frame a shot if we cannot predict where the lightning comes? The answer is we don’t actually think about its location when framing a shot. Just do what we do when taking a nighttime landscape, let the sky take up around 50% - 70% of the composition and wait for the lightning to come. Although lightning is unpredictable, we can have a higher chance of capturing the ideal image if we have good preparation. Take the photo below for example, the lightning above Potala Palace looks very much like a flying dragon and adds a charm to the photo.
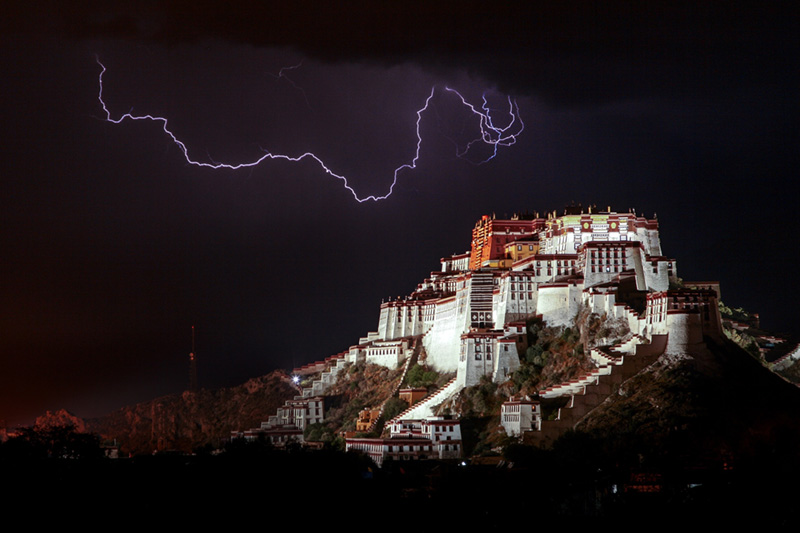
Title: 《布達拉宮之夜》 Club Canon Member: Simon Wong
EOS 5D Mark III • EF 24-105mm f/4L IS USM • 3.2s • f/5.6 • ISO 100
EOS 5D Mark III • EF 24-105mm f/4L IS USM • 3.2s • f/5.6 • ISO 100
Keep Your Camera and Lens Dry and Clean
Rains come with thunder and lightning. We usually find ourselves in a rainstorm when photographing lightning. So protecting your camera against rain is the basic requirement. We suggest wrapping your camera with a towel or plastic bag, and attach a lens hood to reduce the chances of rain leaking onto the lens surface. If there is raindrop on the lens, use an air blower to blow it off rather than a cleaning cloth. This is because using a cleaning cloth may leave water stains, resulting in a partial blur in the photo.
Shoot with Digital Compact Camera
What have been mentioned above are mostly shot with Manual mode. If you are using a digital compact camera to photograph lightning, apart from Manual mode, you can also use the Star Nightscape mode. Both modes operate with the same principle – i.e. the use of a slow speed shutter for long exposure. The Star Nightscape mode is a pretty good option, as it can help you capture nice photos without having to adjust the settings manually.

Title: 《電光之際》 Club Canon Member: Shum Wai
PowerShot G16
PowerShot G16