Beginner’s Guide: Understanding Metering Mode
“Light” is an indispensable element in photography. To achieve an accurate exposure, we adjust the camera’s settings such as aperture and shutter speed so that the right amount of light enters into the camera. “Metering Mode” refers to the way the camera measures the brightness of the subject. Based on the metering result, the camera automatically calculates the right exposure combination to use to achieve a properly exposed image.
EOS DSLR cameras offer 4 metering modes, namely “Evaluative”, “Partial”, “Spot” and “Centre-weighted Average”. Each of which is useful for some particular scenes and subjects. Details of each are explained below:
EOS DSLR cameras offer 4 metering modes, namely “Evaluative”, “Partial”, “Spot” and “Centre-weighted Average”. Each of which is useful for some particular scenes and subjects. Details of each are explained below:
 Evaluation Metering
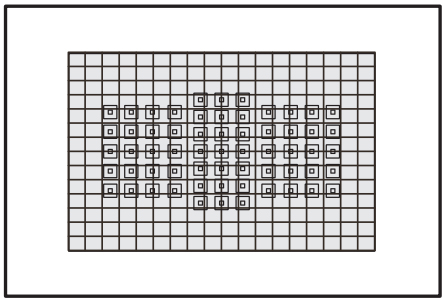
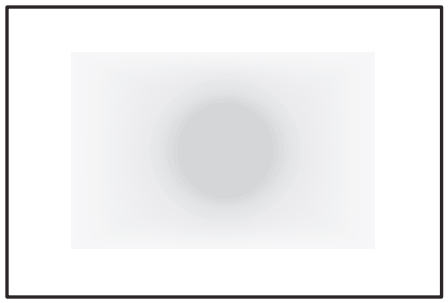
Evaluative metering is the mostly used automatic metering mode in everyday photography and can be applied in most shooting scenarios. As its name suggests, it takes a series of readings in zones that cover the entire frame, and then calculates the overall average exposure value. Since Evaluative metering takes into account the entire frame when determining the exposure, it is useful for low-contrast subjects such as when shooting with front lighting or low-contrast landscape.
Evaluative metering is the default metering mode on most cameras. It ensures that the camera will automatically adjust to the right exposure setting even when the ambient lighting shows greater contrast. Even photography novices who are not familiar with the concept of metering can avoid serious exposure mistakes with this mode.
Evaluative metering is the default metering mode on most cameras. It ensures that the camera will automatically adjust to the right exposure setting even when the ambient lighting shows greater contrast. Even photography novices who are not familiar with the concept of metering can avoid serious exposure mistakes with this mode.

Evaluative metering can be used when shooting landscape
 Partial Metering
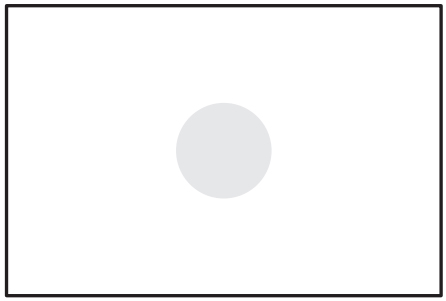
Partial metering covers only the centre 6.2% of the frame in the viewfinder, thus providing precise metering only for the subject. When the background is brighter than the subject due to reasons like back lighting, this metering mode is particularly useful. It is useful for back-lit shots or tiny subjects.
Partial metering is useful in back-lit shots
 Spot Metering
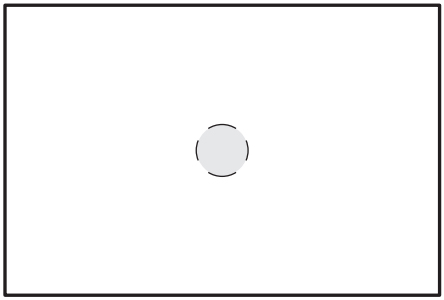
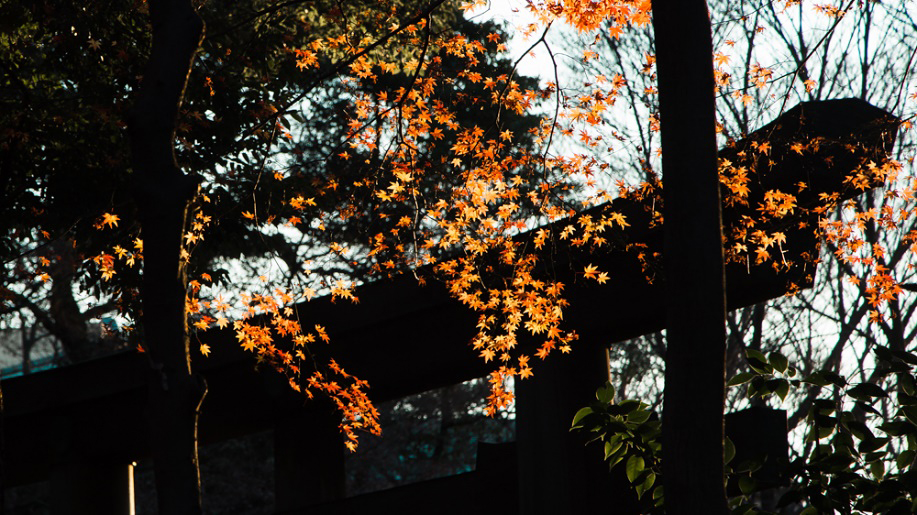
Spot metering only covers the centre 1.5% of the frame in the viewfinder (the percentage varies a bit depending on the cameras) and is thus more precise than Partial metering. This mode only takes reading of a certain spot in the scene or subject, and would not take into account the ambient brightness of the surrounding environment. Spot metering is useful when there is a large brightness difference between the subject and background, for example when taking photos of a spotlighted performer on stage, sunrise or sunset.
Since this metering mode involves determination of the metering point, it is rather hard to use for photography novices. Choosing a wrong metering point would end up either an under-exposed or over-exposed image.
Since this metering mode involves determination of the metering point, it is rather hard to use for photography novices. Choosing a wrong metering point would end up either an under-exposed or over-exposed image.
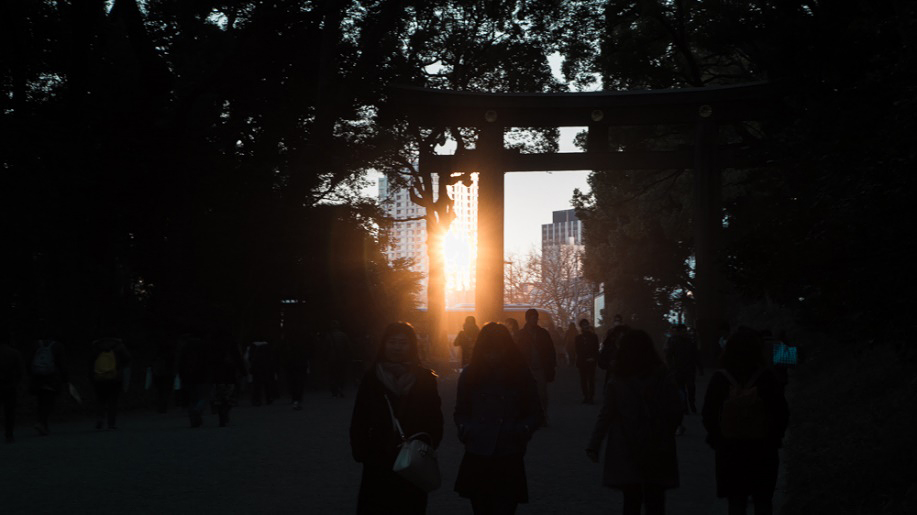
In this silhouette photo, Spot metering on the sun is used
 Centre-weighted Average Metering
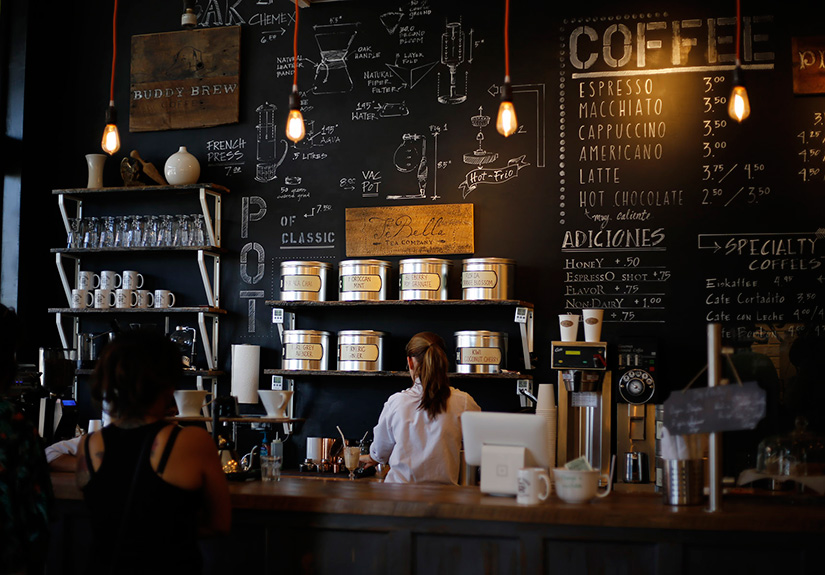
Centre-weighted Average metering is like using Evaluative metering with a centre AF point. It places greater emphasis on the centre area while also taking meter reading across the entire frame. As this metering algorithm places greater emphasis on the centre area when calculating the average exposure value to use, it is particularly useful for scenes with subject located in the centre of the frame.

Centre-weighted Average metering can be used when shooting half-length portraits
How to Change Metering Mode?
Take EOS 5D Mark IV as an example, you can follow these steps to change the camera’s metering mode:
- Set the power switch to < ON>.
- When the camera is ready to shoot, press <
 > (Metering Mode / White Balance Selection) button.
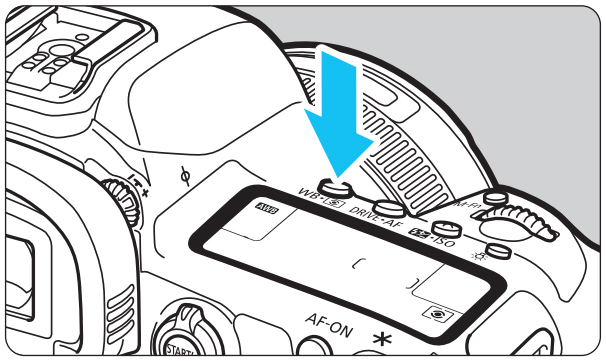
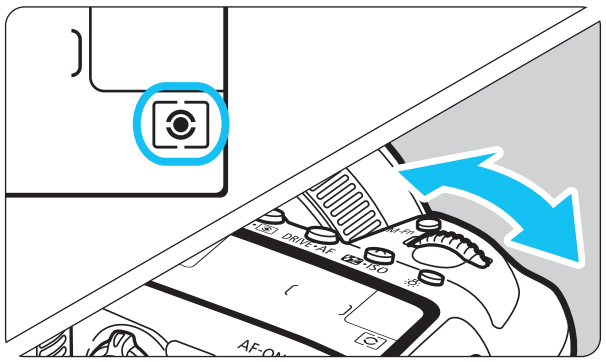
- With your eyes on the viewfinder or LCD monitor, turn < Main Dial> to change metering mode.
How to Determine which Metering Mode to Use?
By summarizing the tips above, Evaluative metering can be used in scenes where the brightness is evenly distributed across the frame (e.g. landscape). Spot metering is useful when you want to outstand the subject in scenes with large lighting contrast or complicated light sources, such as portrait, macro photography or back-lit shooting. In addition, according to the proportion a subject takes up in the frame or its position, Partial or Centre-weighted Average metering can be used. Below shows the differences using different metering modes on the same scene:
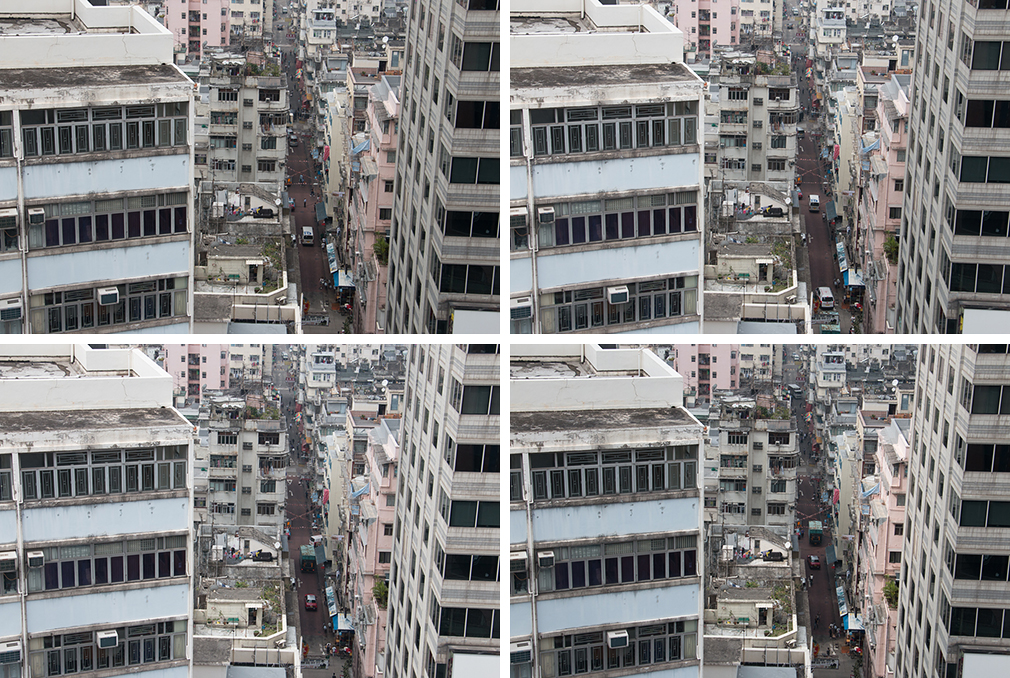
Top left: Evaluative metering; Top right: Partial metering
Bottom left: Spot metering; Bottom right: Centre-weighted Average metering
Bottom left: Spot metering; Bottom right: Centre-weighted Average metering
Since the scene’s lighting contrast is low and the colors of objects are similar, there is no major difference in exposure no matter which metering mode is used. Let’s take a look at another example:
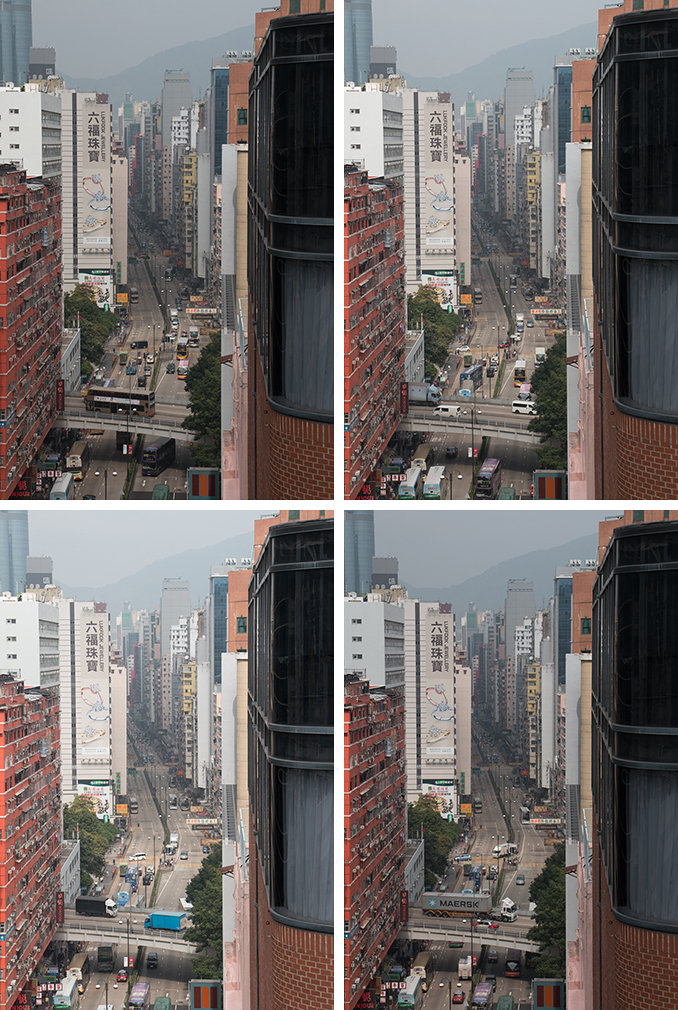
Top left: Evaluative metering; Top right: Partial metering
Bottom left: Spot metering; Bottom right: Centre-weighted Average metering
Bottom left: Spot metering; Bottom right: Centre-weighted Average metering
Since the photo composition includes the sky which is relatively brighter, the photo shot using Evaluative metering (top left) is dimmer in overall exposure as the metering takes into account the sky’s brightness. When Spot metering is used, the photo’s overall exposure (bottom left) increases and looks brighter as the metering point falls on the dim traffic road in the centre.
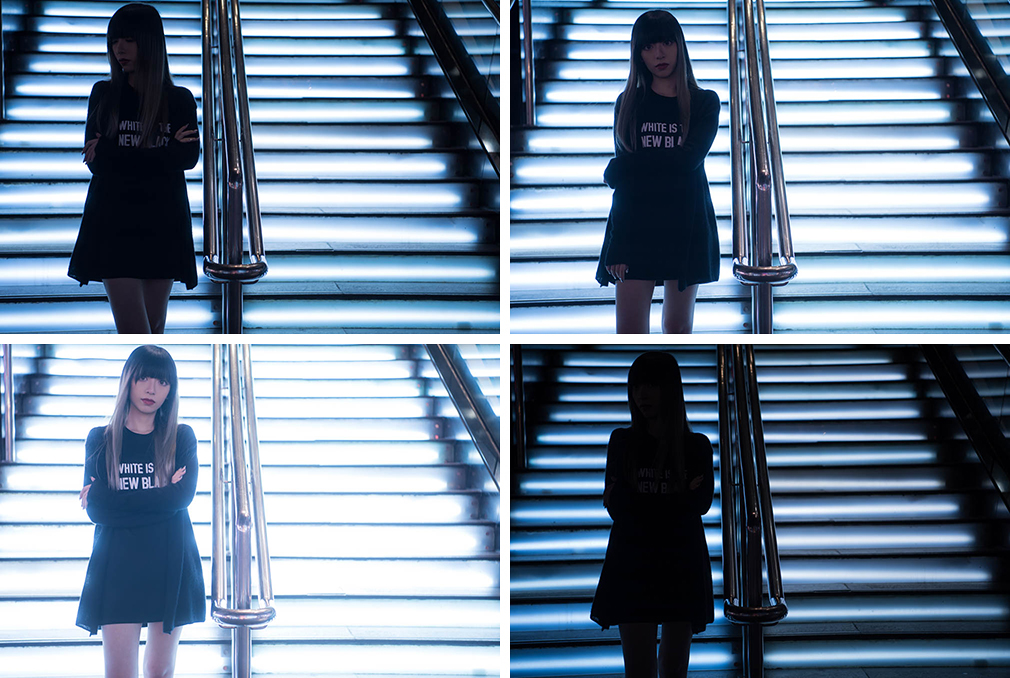
Top left: Evaluative metering; Top right: Partial metering
Bottom left: Spot metering; Bottom right: Centre-weighted Average metering
Bottom left: Spot metering; Bottom right: Centre-weighted Average metering
The above set of photos shows how apparent the differences are when taking back-lit portraits using different metering modes. These imitate the scenarios when shooting portraits at sunset or night, and in these cases Spot metering (bottom left) does a better job.
Related Articles
To many photography beginners, Manual mode (M Mode) seems to be a more advanced shooting mode than Shutter-Priority (Tv Mode) or Aperture-Priority (Av Mode) modes. But this is just a common misperception. In fact, we should know when to use the different shooting modes...