An Image Showing Changes from Day to Night - The Photo - Taking and Post-Editing Process
American photographer Stephen Wilkes’ incredible photo series “Day To Night” fuse moments from day to night of various iconic locations in New York into a single image. It takes a lot of work and time to merge multiple images in order to create one final image that shows smoothly how day spans to night in one frame. This article will show you briefly the creation process. Give it a try if you are interested!
Shooting Method
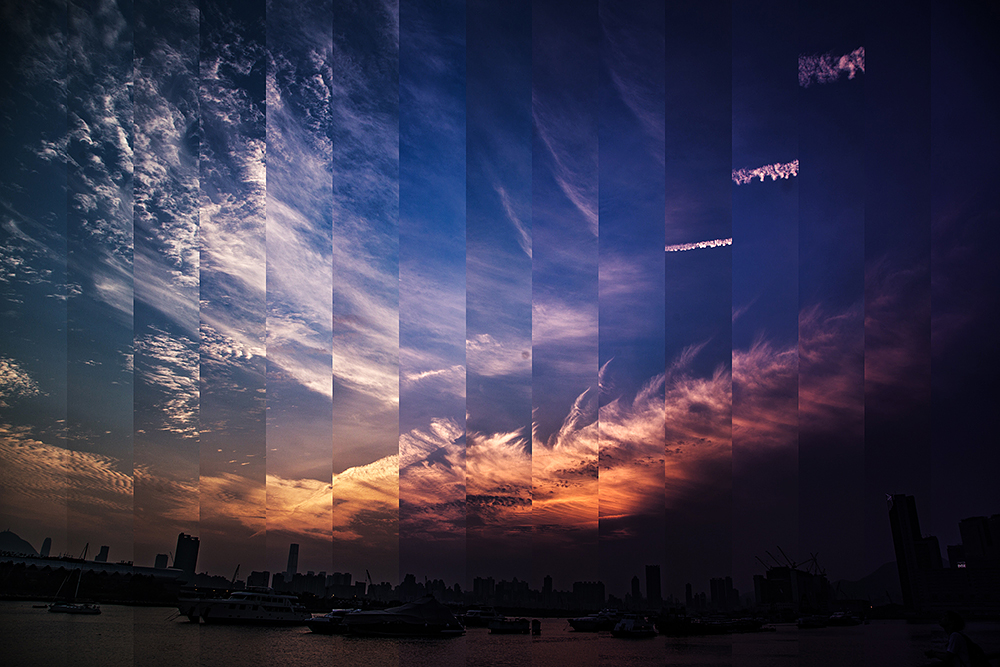
Our final image is like a timeline that records the sky changes from sunset till night. The individual images taken are arranged by time from the left (the earliest) to the right (the latest). The shooting should take place within the Magic Hour, i.e. half an hour before and after sunset time (refers to the exact time when the sun sets below the horizon) announced by the Hong Kong Observatory, in order to obtain the best changes in sky colors. For equipment, since it involves merging multiple images in post-editing, we need a tripod to shoot to ensure compositional consistency.
The sunset time was 6:55pm at the day we took the images. So we started shooting from 6:25pm till 7:25pm, and altogether a total of 15 images were taken with a time interval set at 4 minutes. You can extend the shooting time and set a longer time interval if you want a more substantial change between each shot.
The sunset time was 6:55pm at the day we took the images. So we started shooting from 6:25pm till 7:25pm, and altogether a total of 15 images were taken with a time interval set at 4 minutes. You can extend the shooting time and set a longer time interval if you want a more substantial change between each shot.
Post-Editing Process
*Demonstrated using Photoshop CC
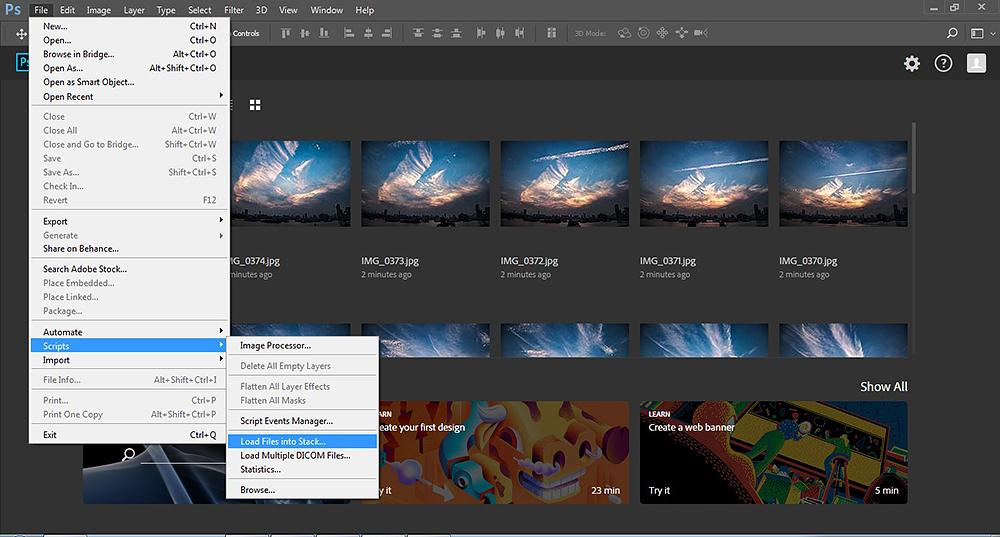
Choose “File” > “Script” > “Load Files into Stack”
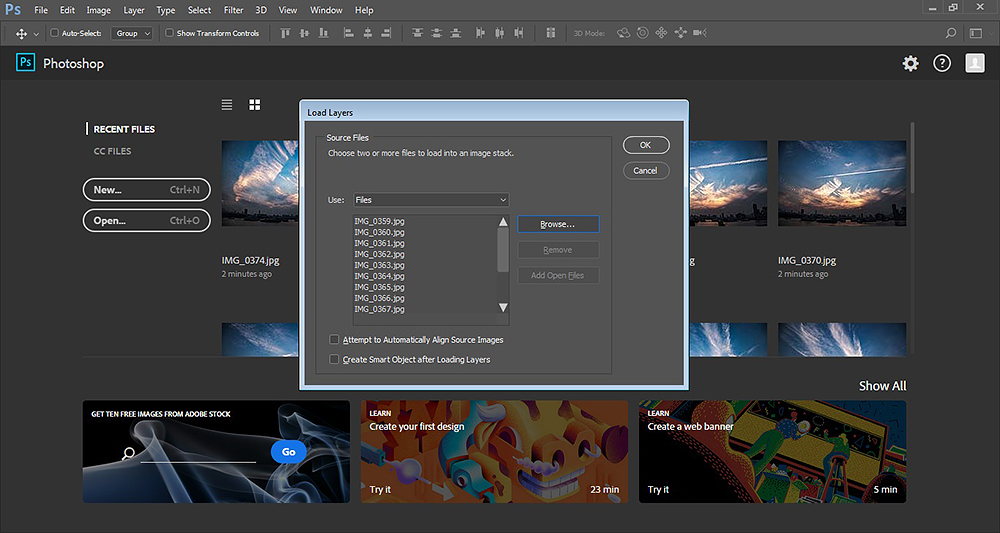
Click “Browse” to select images and the images will be placed on different layers in one single file. The images taken should be named numerically in an order according to the shooting sequence
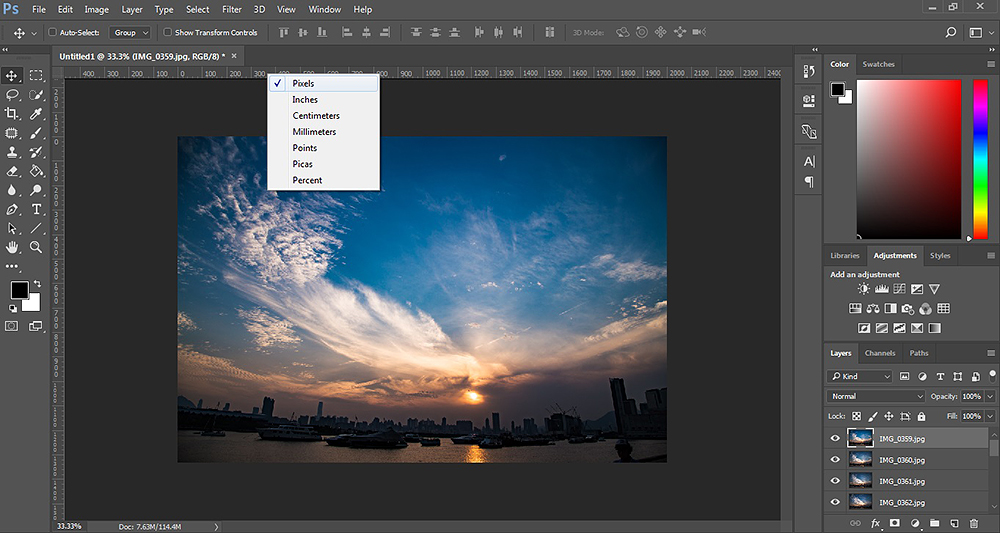
We have 15 images this time, so we need to divide the frame into 15 sections. A width of 2000px divided by 15 is 133px each. Then we select the first image (the earliest one and on the leftmost), right-click on the top ruler and select “Pixels”
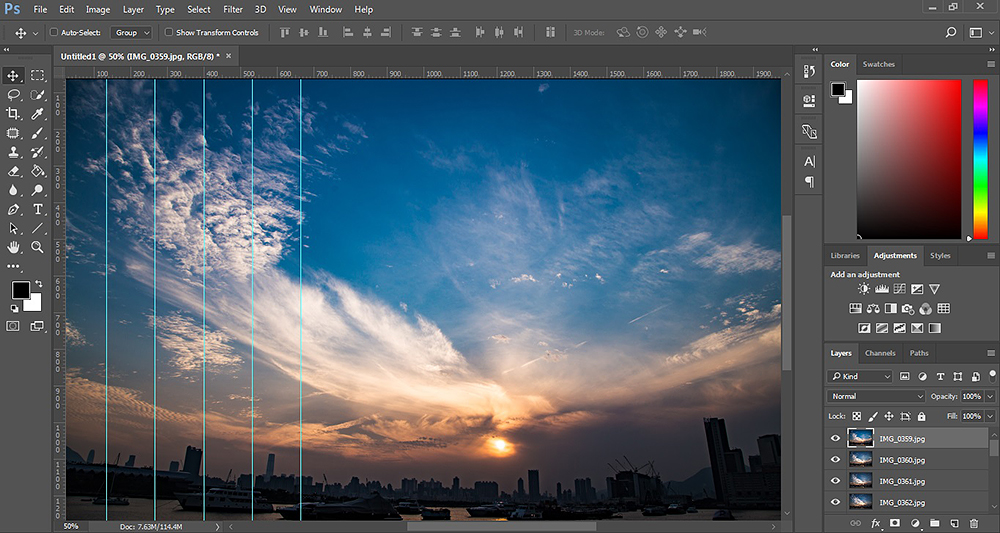
Left-click on the left ruler, hold and drag to the right till you reach the 133px position. Repeat this step by adding 133px each time
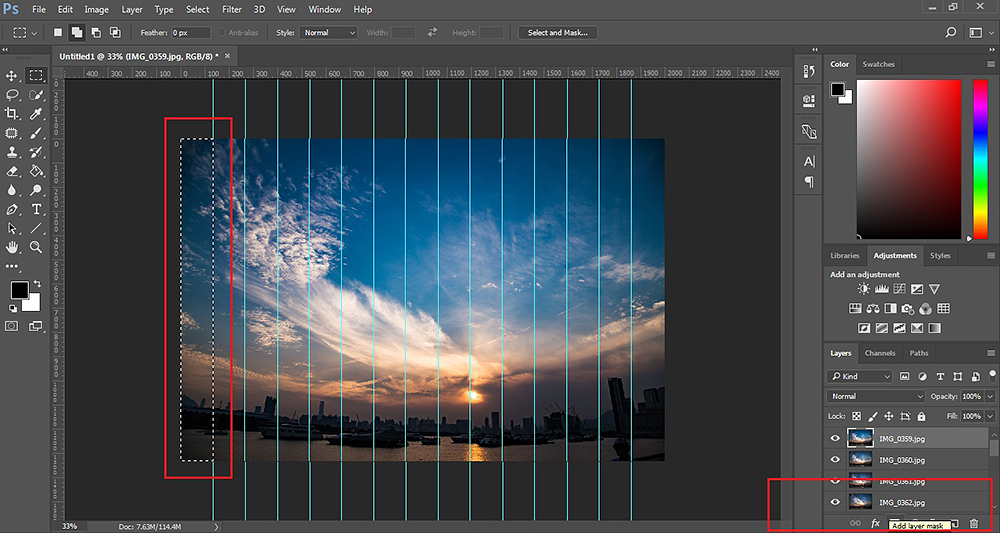
Click on the image layer, use the Select tool to select the respective section and then click “layer mask” to display only the portion within the selected area. Repeat this step for the rest of the images to merge the 15 images into one final image
The creation process of day to night shot as shown above is actually not difficult but requires patience in both the photo-taking and post-editing process. Pick a nice weather evening and try it out yourself!
Related Articles
Many people love to photograph sunrises and sunsets. However, these scenes which are beautiful to the eyes may not be easy to capture owing to the inherent physical differences between the camera and the naked eyes.