Chasing the Aurora Borealis in Iceland
Seeing auroras in person is many people’s dream. We were lucky to have seen a powerful display of the aurora borealis in Iceland earlier this January, and would love to share our experience and tips in chasing the aurora borealis in this article.
A natural spectacle only happens in wintertime, aurora borealis can be spotted between September and March every year, sometimes till April if you are lucky. Picking a right location is the first thing to do to see the aurora borealis. Regions within the Arctic Circle have a better chance to see, such as the northern part of Sweden, Norway and Finland. Iceland near the Arctic Circle is also a popular location for seeing the aurora borealis. This splendid natural spectacle requires, however, long hours of painful waiting. Weather, cloud distribution and the KP Index are all factors that determine the appearance of the aurora borealis. No one can tell you when they will appear. We can only analyze the probability of appearance with data and wait in the dark.
A natural spectacle only happens in wintertime, aurora borealis can be spotted between September and March every year, sometimes till April if you are lucky. Picking a right location is the first thing to do to see the aurora borealis. Regions within the Arctic Circle have a better chance to see, such as the northern part of Sweden, Norway and Finland. Iceland near the Arctic Circle is also a popular location for seeing the aurora borealis. This splendid natural spectacle requires, however, long hours of painful waiting. Weather, cloud distribution and the KP Index are all factors that determine the appearance of the aurora borealis. No one can tell you when they will appear. We can only analyze the probability of appearance with data and wait in the dark.
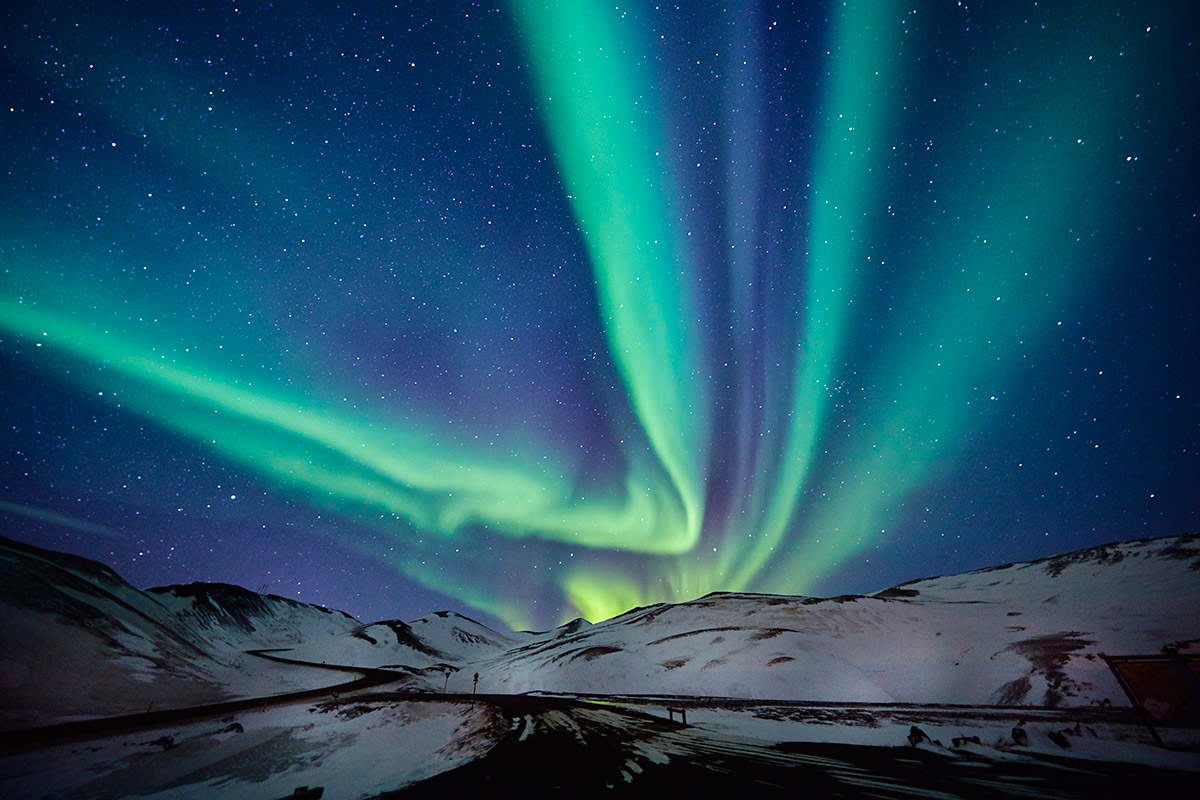
EOS 5D Mark IV • EF 11-24mm f/4L USM • 30s • f/4 • ISO 1250
To see the aurora borealis, first we have to know the direction. Experienced locals told me that the aurora borealis only appear in the northwest sky. Get prepared so you won’t miss them when they come and go. Next we need to check the weather and cloud cover forecasts. You can check the weather condition at http://en.vedur.is/weather/forecasts/areas/. Auroras are only visible on clear, cloudless sky. If the weather forecast shows cloudy or even snowstorms prediction, sightings are very unlikely. Yet I do think travelers coming here share a same belief: we come a long way here and won’t give up that easily! If the weather forecast is good, next we can go check the cloud cover forecasts at http://en.vedur.is/weather/forecasts/cloudcover/. Low and mid-level clouds are unfavorable for aurora viewing. Look at the map carefully. Areas in dark green are cloudy while areas in white are cloudless. Locate yourself on the map and search for the nearest cloudless area to go. When you look up on the map, don’t just focus on the current cloud distribution, but also have a look on how the clouds change in 3-4 hours. It’s because we have to drive for 1 or 2 hours in Iceland to get to the next destination. So count your driving time when you check the forecast.
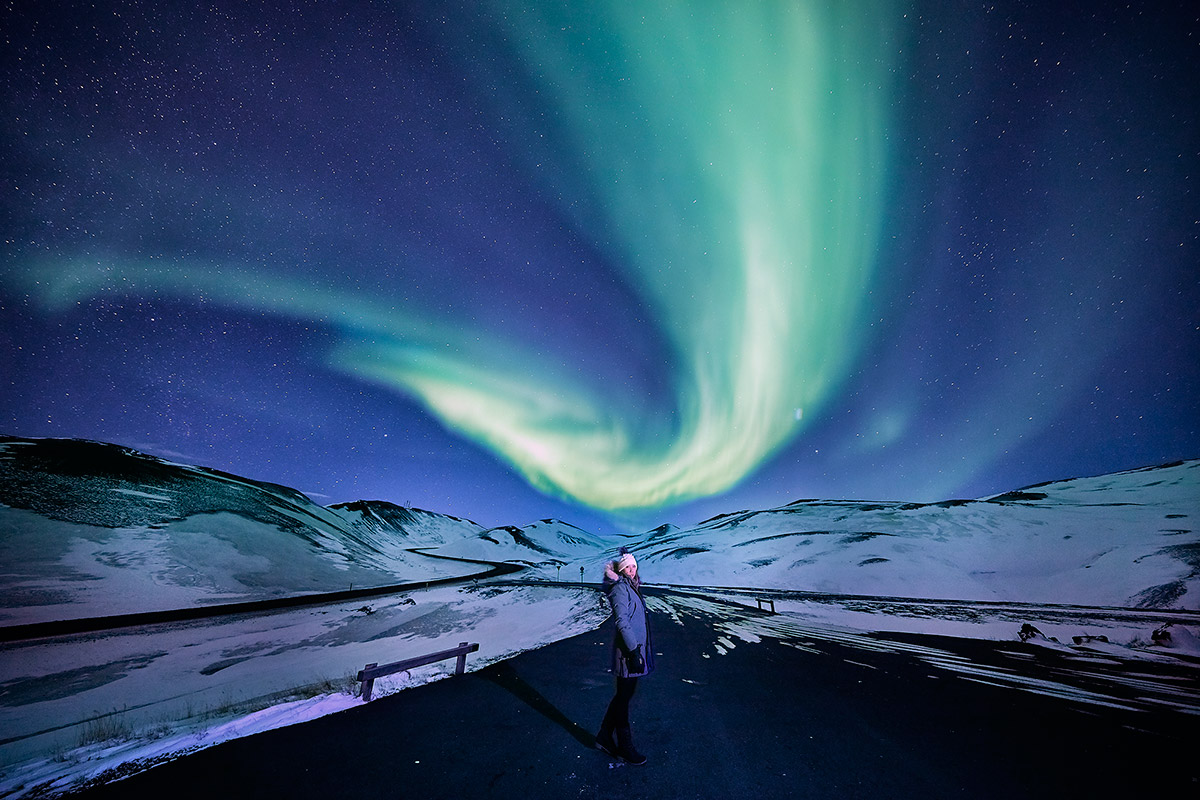
EOS 5D Mark IV • EF 11-24mm f/4L USM • 25s • f/4 • ISO 1250
Chasing the aurora borealis is an activity that requires high persistence. The sighting of it and when will it appear are all unknown. Therefore, bundling up to keep yourself warm is very important. However, that doesn't mean just putting all the clothes on. The ideal outfit in the Arctic region is “Layering up”. First wear thermal tops and pants as the inner base layer, then sweater and fleece jacket in the middle and water- and wind-proof coat or down jacket as the outerwear. Don't forget to wear a pair of water-proof snow pants, thick wool gloves and socks. Scarf, hat and snow shoes are also important to prevent heat loss through your head or feet.
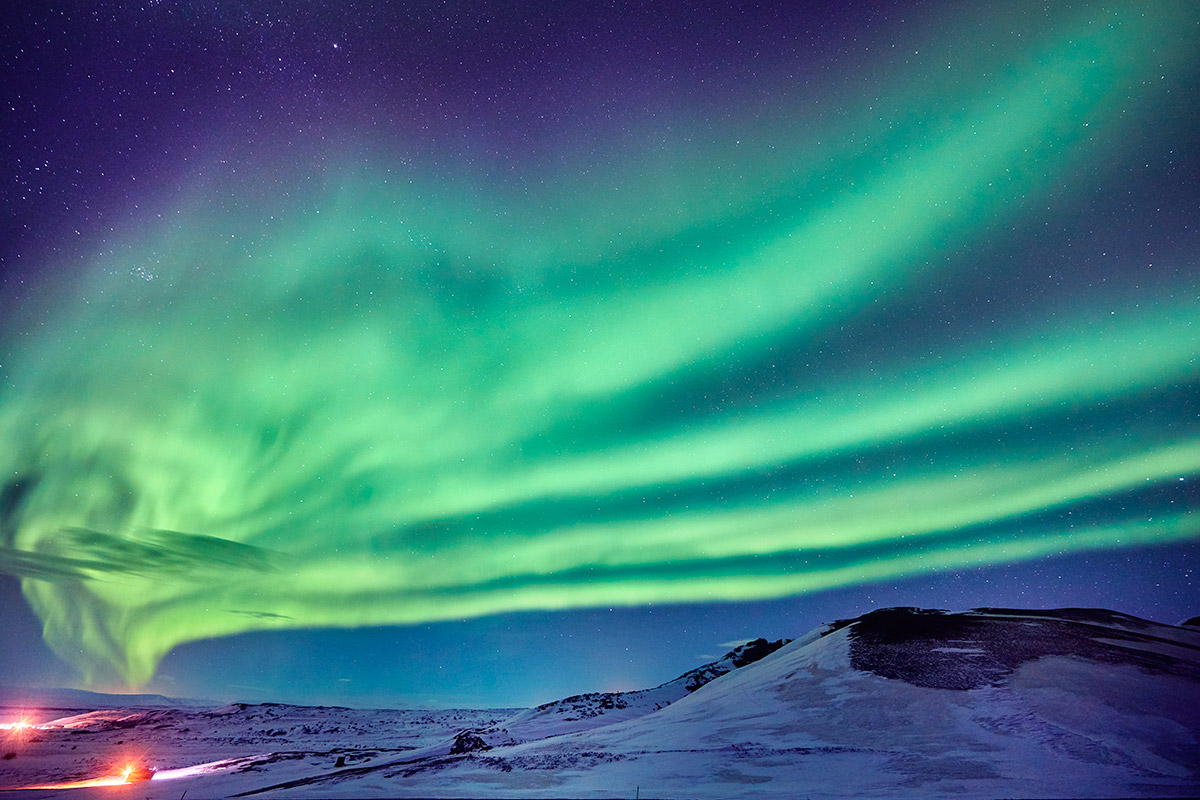
EOS 5D Mark IV • EF 11-24mm f/4L USM • 30s • f/4 • ISO 1250
Also remember to bring a rigid tripod for outdoor use with you. Make sure the tripod remains steady even in strong wind. To capture the beauty of aurora borealis dancing slowing in the sky, we suggest to use a full-frame camera with high ISO settings. Bring at least one f/2.8-f/4 wide-angle lens so that the angle of view is wide enough to capture the entire aurora borealis. For composition, you can do a little research beforehand on the Google Map for the places you are going to visit, and look for any special landscape such as mountain range or valley, or buildings with local characteristics. You can use these as the background of your aurora photos for more stunning result.
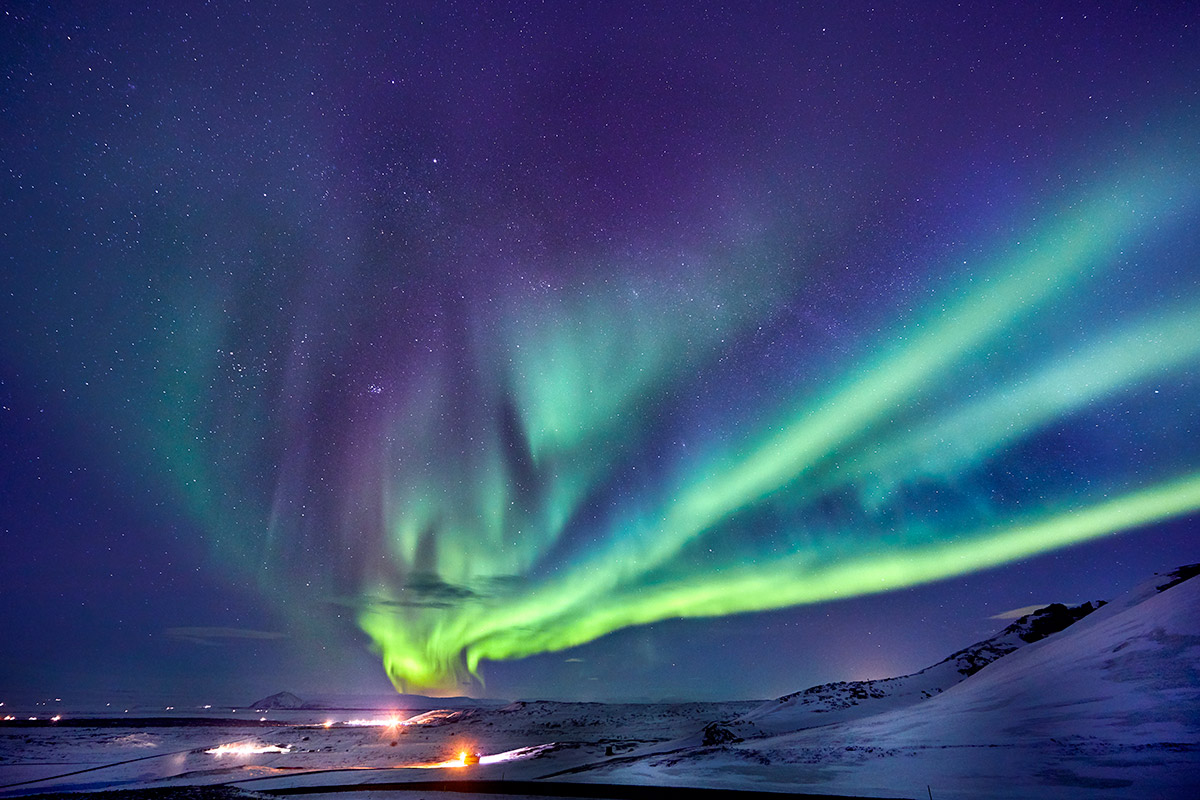
EOS 5D Mark IV • EF 11-24mm f/4L USM • 25s • f/4 • ISO 1250
Aurora borealis are hard to see, that’s why they are so fascinating. Those who are determined to see the aurora borealis should stay a few more days and never rush your itinerary. Some of the travelers I met before who complained about failing to see the auroras were suffered from a rushed itinerary. They might want to visit more places in fewer days, but this turned out lacking the flexibility to change the plan when they had a chance to see. We hope that this article can give you a little help and tips on your journey to chasing the aurora borealis, and we wish you lots of luck and succeed in seeing a splendid display of auroras memorable for a lifetime.
Facebook:霸氣窮遊
Facebook:霸氣窮遊